
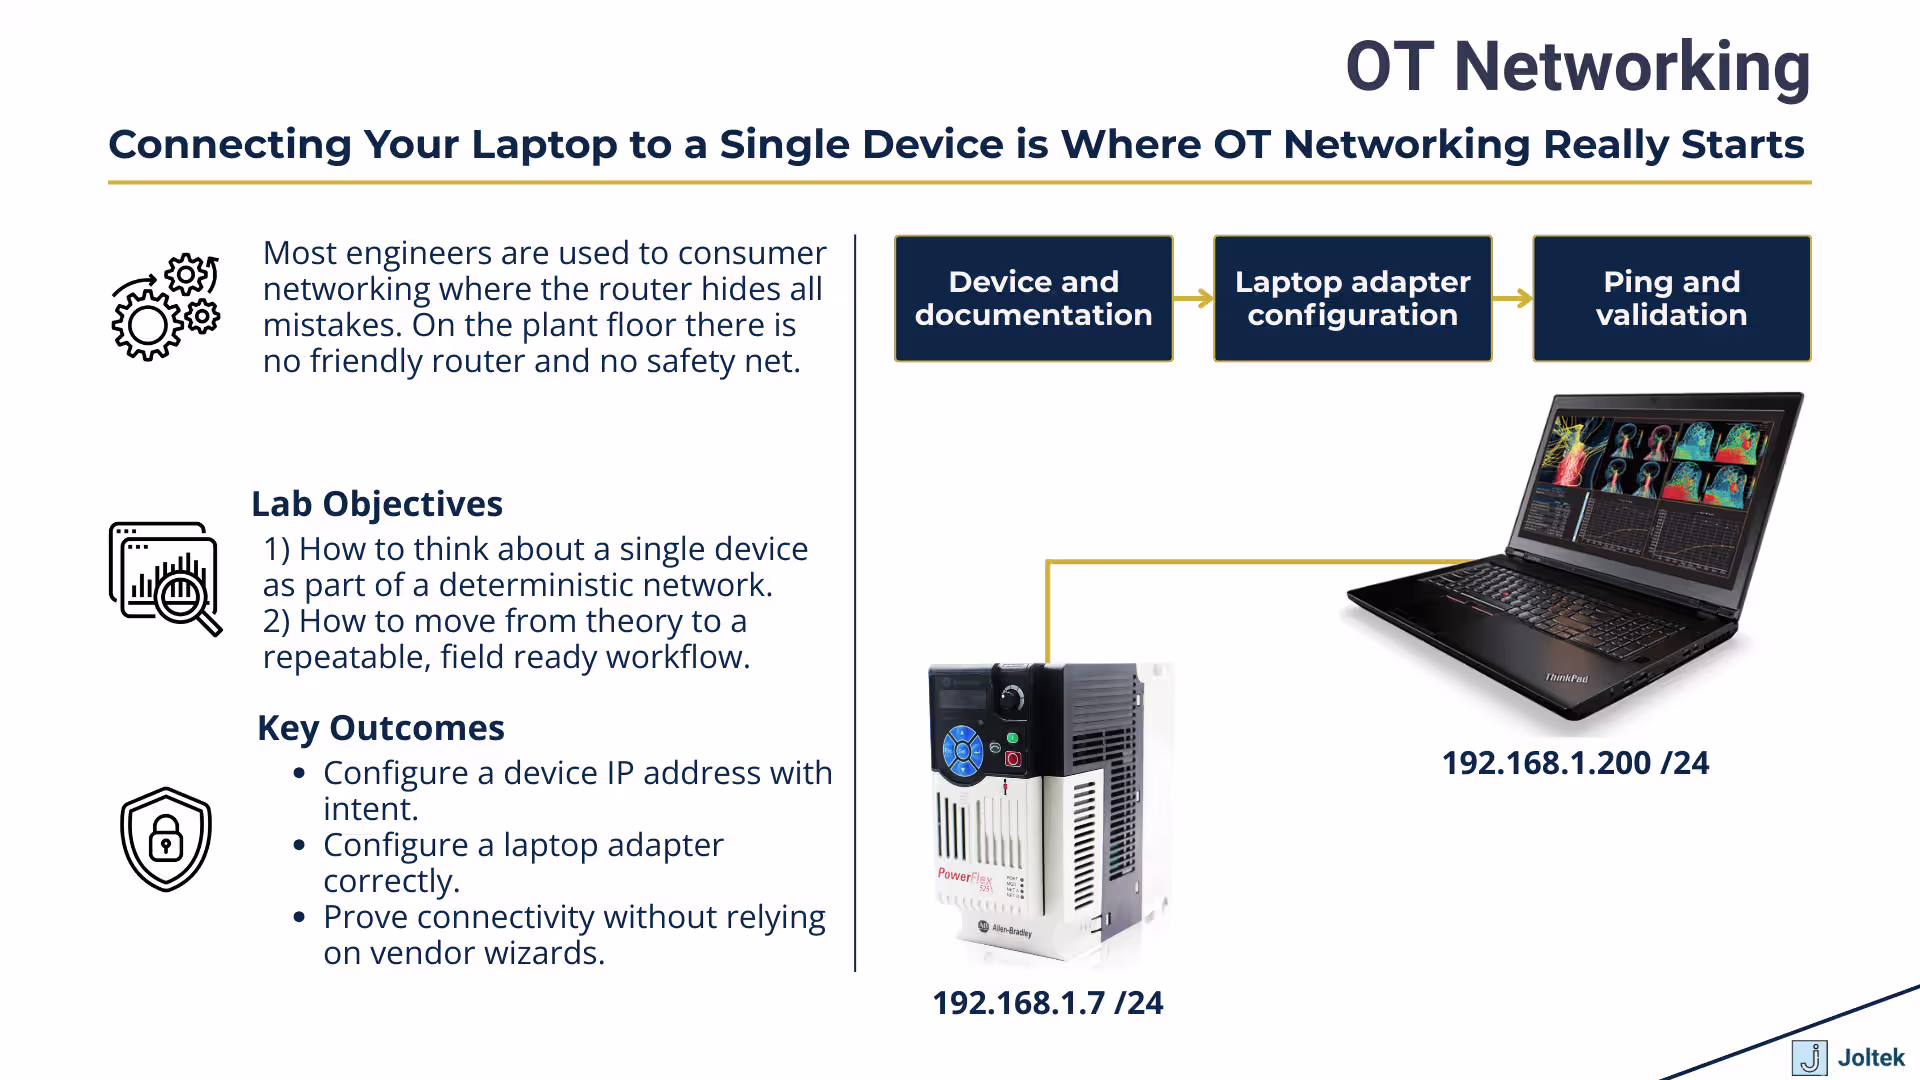
When people start learning OT networking, they often imagine that the hard part will be advanced architectures, modern switches, or complex security controls. In reality, the first real challenge appears much earlier. It appears the moment you try to connect your laptop to a single industrial device and absolutely nothing responds. There is no friendly wizard. There is no home router quietly fixing your mistakes. There is only the device, your laptop, and your understanding of how they should talk to each other.
This first lab is about that exact moment. We take a very common piece of hardware such as a PowerFlex drive, connect it to a laptop through a simple adapter, and walk through the exact steps required to get a reliable reply from a ping command. Along the way you have to identify the correct port on the device, read the data sheet, find and understand the parameters that control the IP address, configure your laptop with a compatible address, and verify communication without any automation doing the work for you.
The goal of this article is to turn that process into something repeatable and predictable. We are not going to cover every possible topology or protocol. Instead we will focus on the fundamentals that apply across almost any Ethernet capable device you will see in the field. You will see how to think about hardware the way a controls engineer or technician does, how to approach documentation efficiently, and how to configure your laptop in a way that avoids the most common mistakes. Once these basics are solid, everything else in OT networking becomes much easier to reason about.
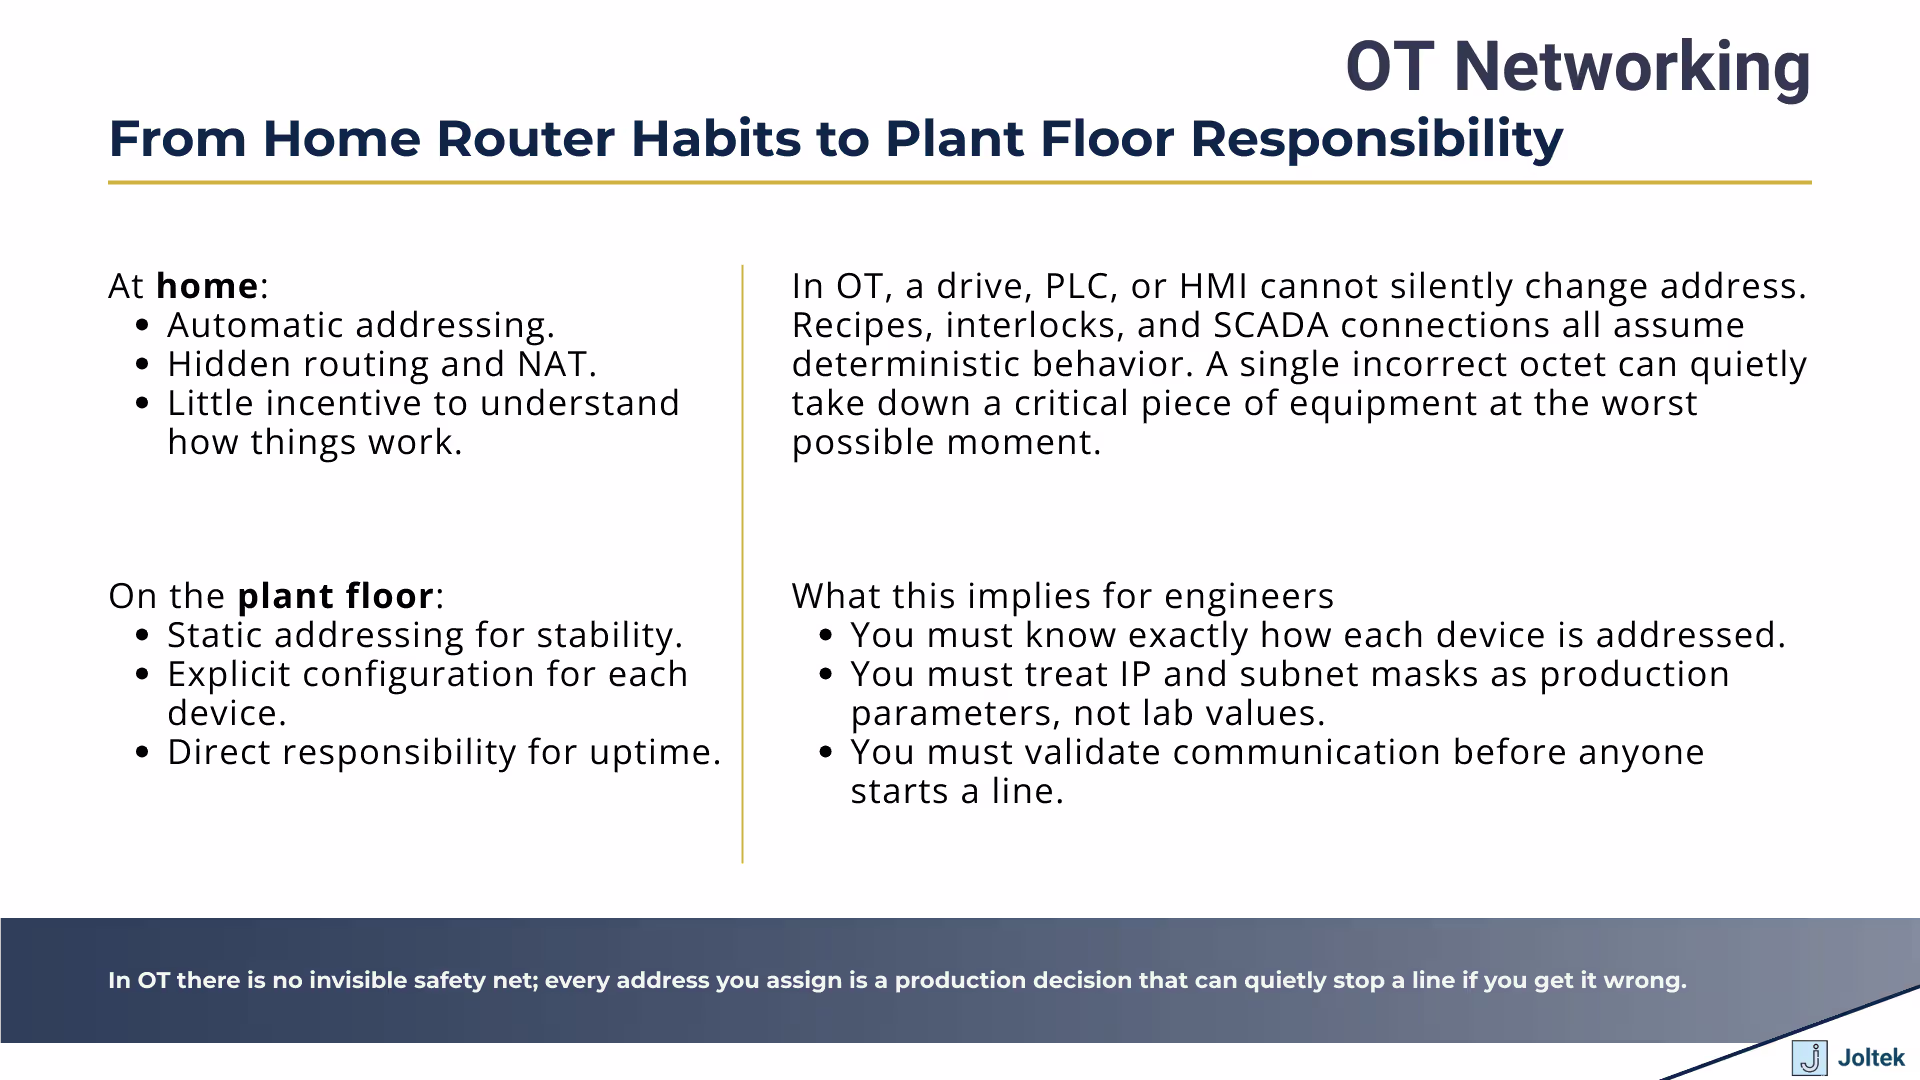
Most people come from environments where networking is invisible. At home a wireless router assigns addresses, provides name resolution, and hides all of the underlying work. You plug in a device, it appears on the network, and that is usually the end of the story. In a plant that model falls apart very quickly. Drives, PLCs, HMIs, and switches expect fixed addresses. There is no consumer router correcting your choices in the background. Industrial devices assume that you know exactly what address they should have and that you are willing to take responsibility for every part of the configuration.
That shift in responsibility is the reason this first lab is so important. When you plug your laptop into a device on the bench, you are forced to confront what an IP address actually means, how a subnet mask works, and why two devices must share a network but not an exact address. You learn that if the laptop and the drive do not share a compatible address range, nothing works. You see that if you accidentally give them the same address, replies will be intermittent or confusing. That experience is much more valuable than hearing a definition of networking terms on a slide. It creates intuition that you will rely on later when architectures grow more complex or when multiple vendors and layers of equipment enter the picture.
This exercise also connects directly to broader architectural work. Once you understand what is required to talk to a single device, it becomes much easier to understand how entire lines and facilities are wired and addressed. When you start thinking about plant level networks, segmentation, and how data moves up into SCADA or MES systems, you are still dealing with these same basic concepts at a larger scale. If you want a broader view of how device level communication eventually ties into full plant designs, you can look at the overview of IT OT architecture and integration at IT OT architecture and integration.
In a lab you can fumble through the configuration and eventually get it right. On a running production line, that luxury disappears very quickly. If you misconfigure a drive on a live system, you might take down a conveyor or interrupt a batch. If you change the address of the wrong device, you might disconnect an HMI or a PLC at a critical moment. The expectation in industry is that when you plug into something, you know why you are there, what you plan to change, and how you will verify that everything is still working when you are done.
This first connection lab is where that mindset starts. You are not simply trying to get a ping response. You are building a habit of approaching equipment methodically. You check labels before you touch anything. You power up hardware intentionally. You read at least the networking section of the manual before pressing buttons. You take a moment to think about what else might be connected to the same device or port. You begin to treat every configuration choice as something that can either protect or threaten uptime, even during a simple lab exercise.
When you carry that discipline into real facilities, it changes the way you troubleshoot and the way others perceive your work. You become the person who does not guess at network settings, who does not randomly reset devices, and who can explain what changed and why. That trust is critical when you start working on larger projects, connecting more complex systems, or advising on modernization efforts across multiple lines and plants.
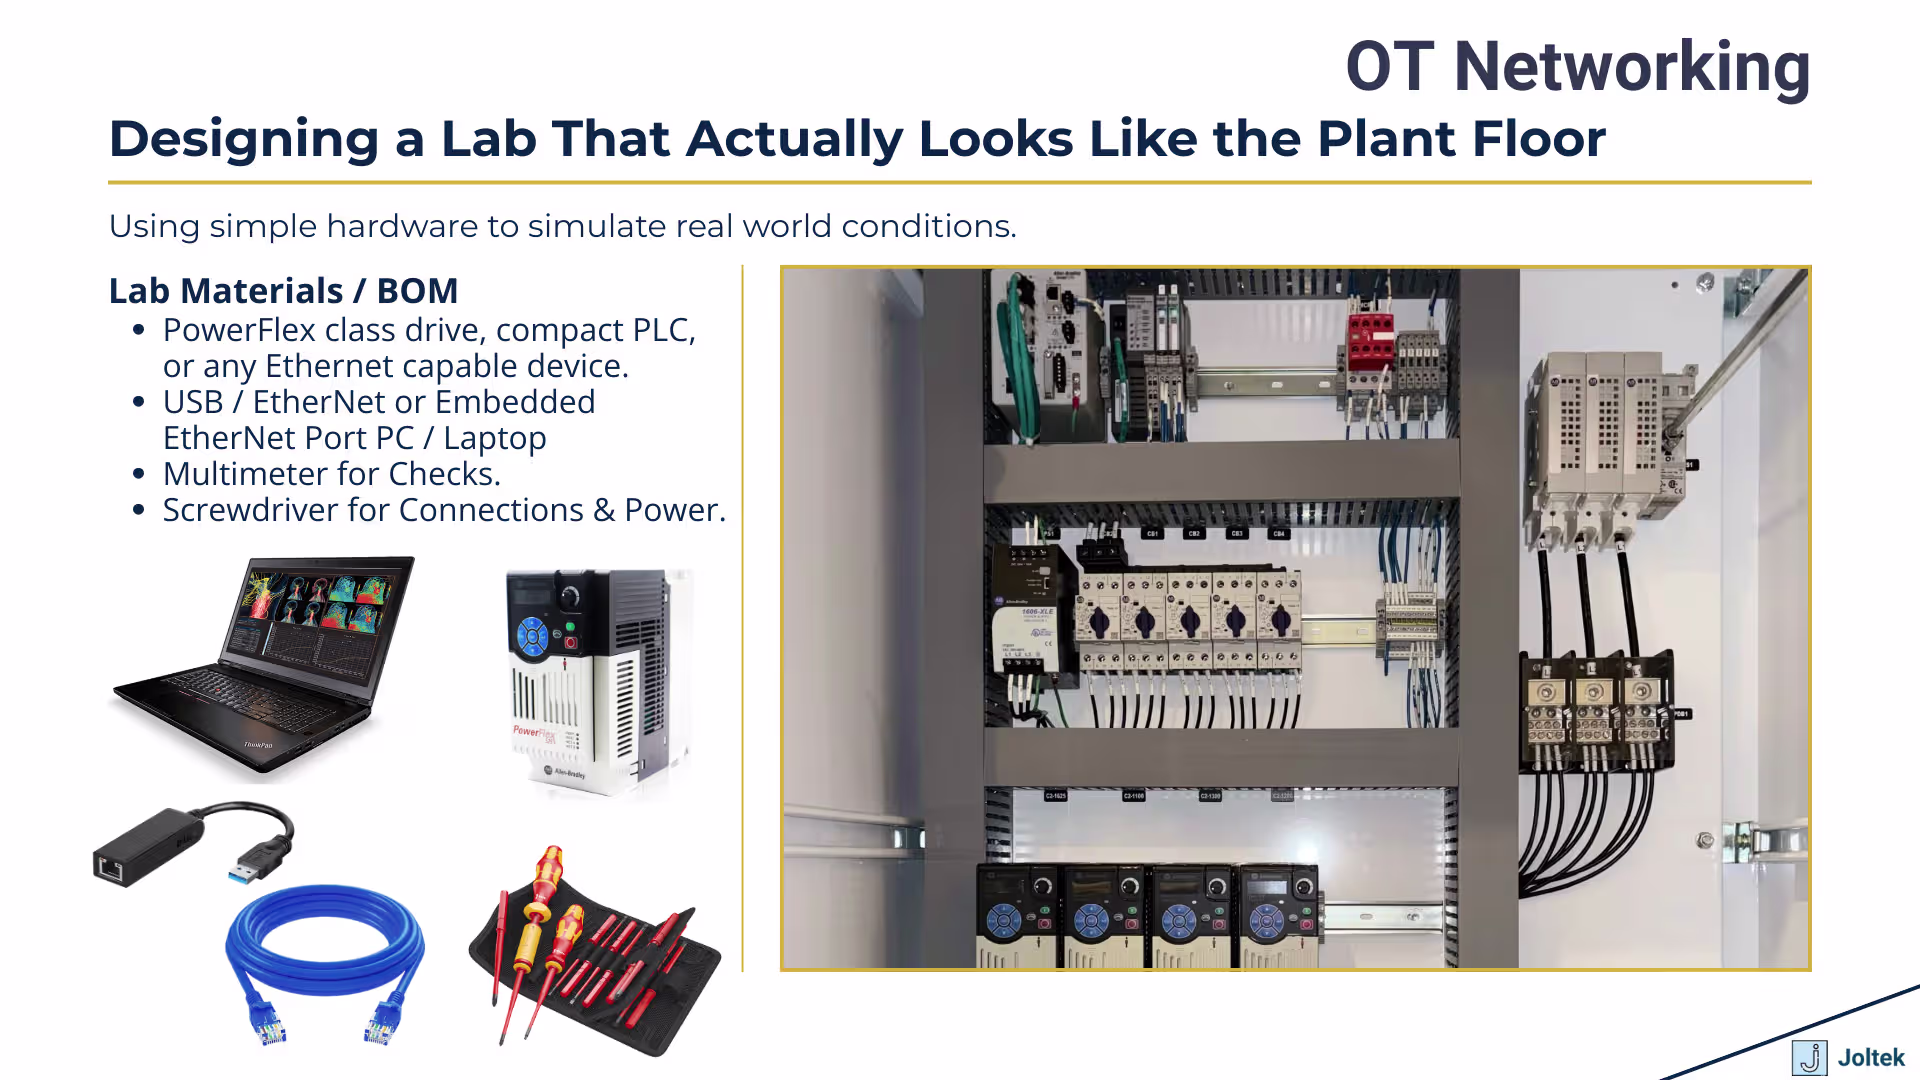
The video uses a PowerFlex drive as the example, but the principles apply to almost any Ethernet capable device you encounter in the field. At a minimum you need a device that speaks Ethernet, a way to physically connect your laptop, and a few simple tools. For many modern laptops that means a USB to Ethernet adapter, since dedicated Ethernet ports have disappeared from a lot of hardware. From there you need a known good Ethernet cable, power to the device, and a basic tool such as a screwdriver to open covers or secure terminations.
This sounds simple, but it mirrors what happens in real facilities. You often arrive on site with your laptop, a small kit of cables and adapters, and maybe a shared set of tools from the maintenance shop. You do not always get the exact vendor recommended accessory or a perfectly documented panel. You might have to trace where cables are going, identify which port is actually live, and figure out how the device is currently powered. The important point is that your lab setup should feel like a realistic miniature version of the plant, not a perfectly staged classroom demonstration that hides all of the messy details.
As you build your own lab, it is worth standardising on a small set of devices you can reuse in different exercises. A single drive, a compact PLC, a simple HMI, and a managed switch can cover an enormous amount of ground. You do not need every possible brand and configuration. What matters is that you know how to discover their addresses, log into them, and change settings in a controlled way. The more comfortable you become with that process in one vendor ecosystem, the easier it is to adapt to another.
Even though this lab focuses on networking, the hardware still carries real energy. The drive needs line voltage to power up. The panel may contain terminals that are not insulated. The connectors may sit close to high voltage wiring. In the video this is managed in a controlled environment, but the same awareness must translate to the plant floor. Before you reach into a cabinet to attach an Ethernet cable, you need to understand the lockout procedures, the available isolation points, and whether it is acceptable to work live in that particular context.
Once you are working safely, the next practical detail is port selection. A PowerFlex drive, for example, can have multiple physical ports that look similar. One might be for EtherNet IP communication and another for a vendor specific serial link. They may sit behind a removable cover or be positioned next to one another with only a small label to distinguish them. If you plug your cable into the wrong interface, no amount of addressing will fix the fact that you are speaking the wrong protocol on the wrong physical connection. Being deliberate about which port you use is just as important as assigning the correct address.
This is not unique to drives. Many PLCs, remote I O modules, and communication adapters have multiple interfaces. Some are used for programming. Some are used for field traffic. Some can be configured to serve both roles but have different behaviours or capacity limits. Learning to read the labels, cross reference them with the manual, and visually confirm your connection is an essential skill. It prevents you from blaming the network for a problem that is really just a cable in the wrong place.
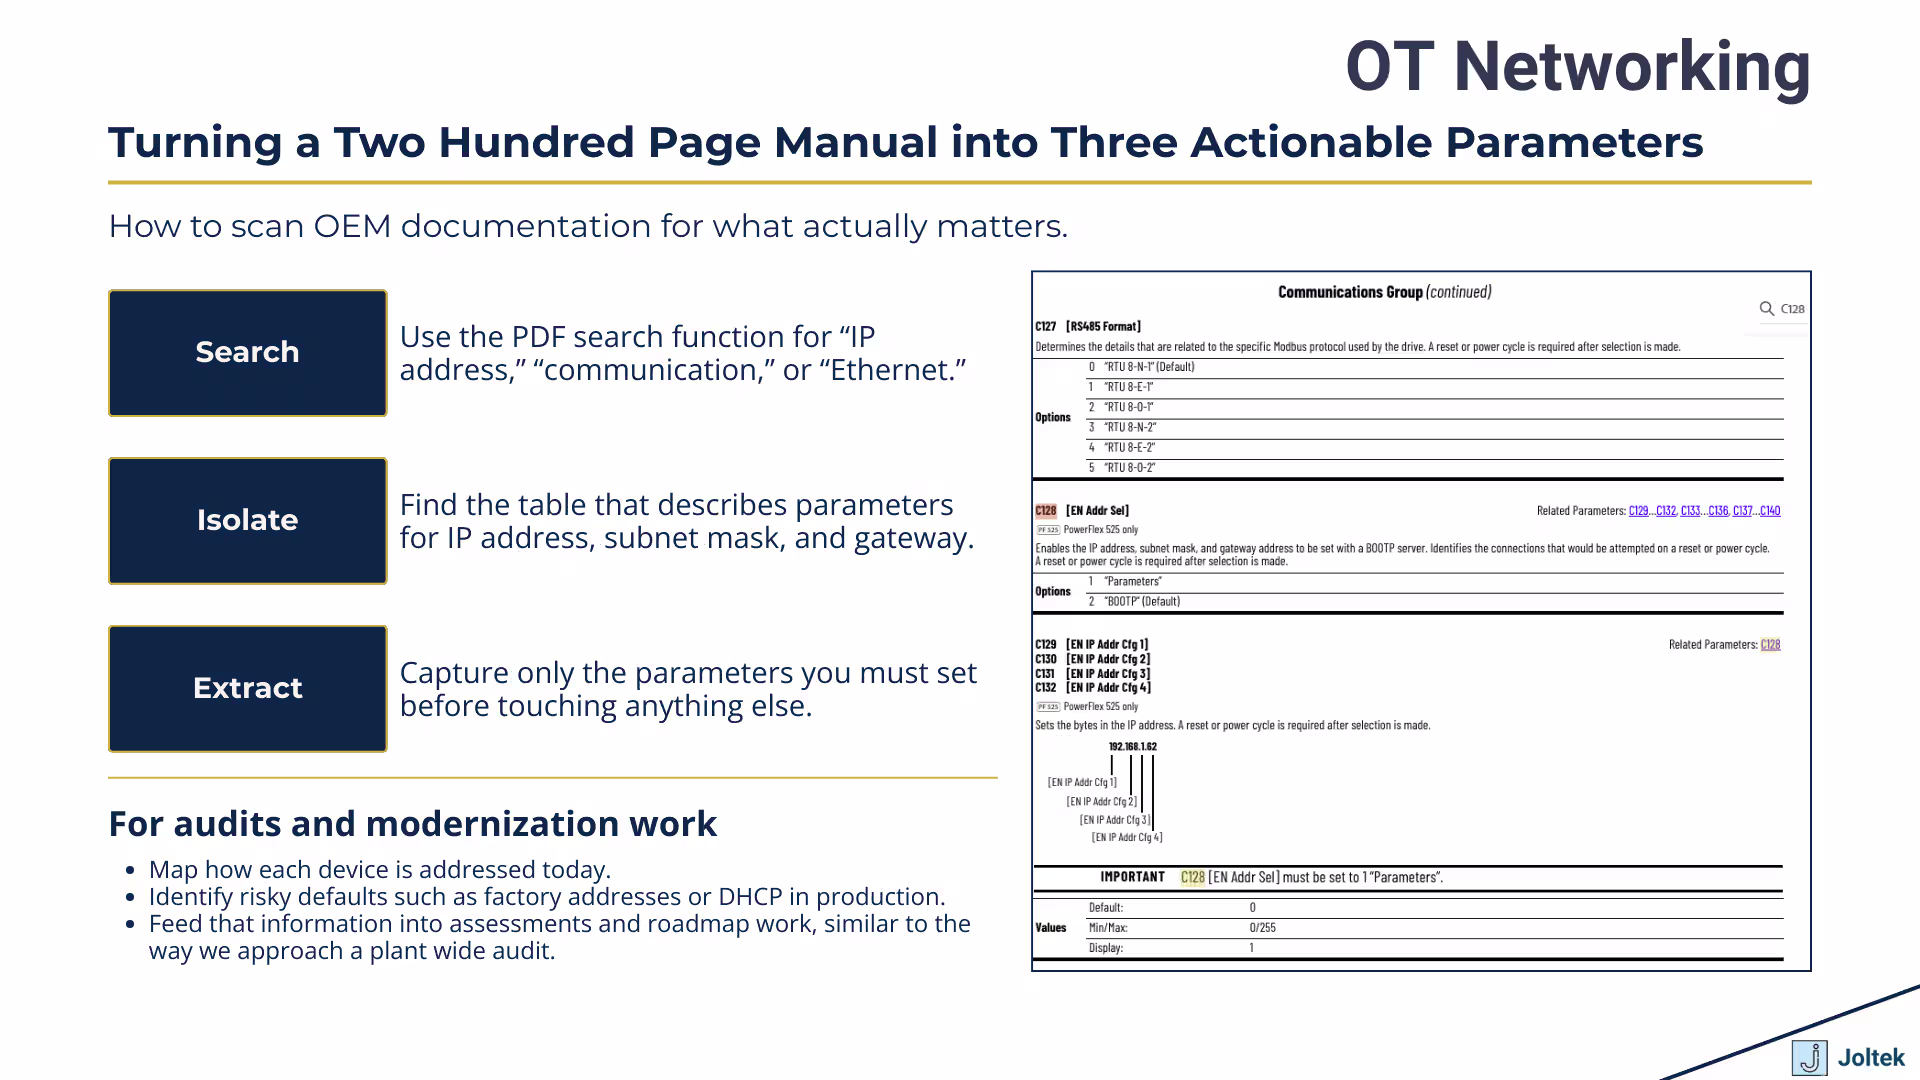
OEM manuals can easily reach several hundred pages, and the first time you open one it is tempting to assume that you will have to read everything before doing any work. In practice, you learn to navigate directly to the sections that control communication. For something like a PowerFlex drive, the parameters that define the IP address and subnet mask are grouped under communication settings, often in a table that lists each parameter number and its meaning. In the video this shows up as parameters such as C one two eight through C one three two for the IP address octets, and additional parameters for the subnet mask.
An efficient way to find these is the same approach used in the lab. You use the search function in the PDF viewer for terms such as address or communication. From there you locate the Ethernet or network configuration section and look specifically for parameter tables, examples, and notes about defaults. You do not need to understand every possible option immediately. You only need to know which parameters must be set for the device to live at a known address on your network. The real value comes from being able to pull the few critical details out of a long manual and apply them correctly in the field.
This habit becomes crucial when you start doing broader assessments and audits. When you walk down a line and see multiple generations of hardware, different vendors, and inconsistent documentation, the ability to quickly extract network related information lets you understand how everything is currently addressed and how risky those choices might be. That is the same skill set you rely on when performing a structured review of a facility as described in the article on manufacturing plant audits and digital transformation at manufacturing plant audit and digital transformation.
In addition to the manual, the hardware itself carries a lot of useful information. The drive or PLC will have a label with a part number, voltage rating, and sometimes firmware version. Somewhere nearby, often close to the Ethernet connector, you will find a separate label with the MAC address. That MAC address is the permanent hardware identity of the device on the network. While the IP address can be changed, the MAC address stays fixed and is used by switches and other devices to direct traffic at the data link layer.
Knowing where to find this label and how to read it is more than a formality. When you scan a network from a switch or use diagnostic tools, you will see traffic identified by MAC addresses. When there is an IP address conflict or a misconfigured device, you can use those MAC addresses to determine which physical unit is responding. Being able to correlate the MAC addresses you see in software with the labels on actual equipment gives you a much clearer picture of what is happening on the network.
This is especially helpful in plants where documentation is incomplete or outdated. You might not have a reliable network diagram, but you can still walk the line, read labels, and build your own understanding of which device corresponds to which MAC address and which address. Over time that becomes a living map in your head and ideally a documented asset for the facility, which makes future troubleshooting and modernization efforts much more efficient.
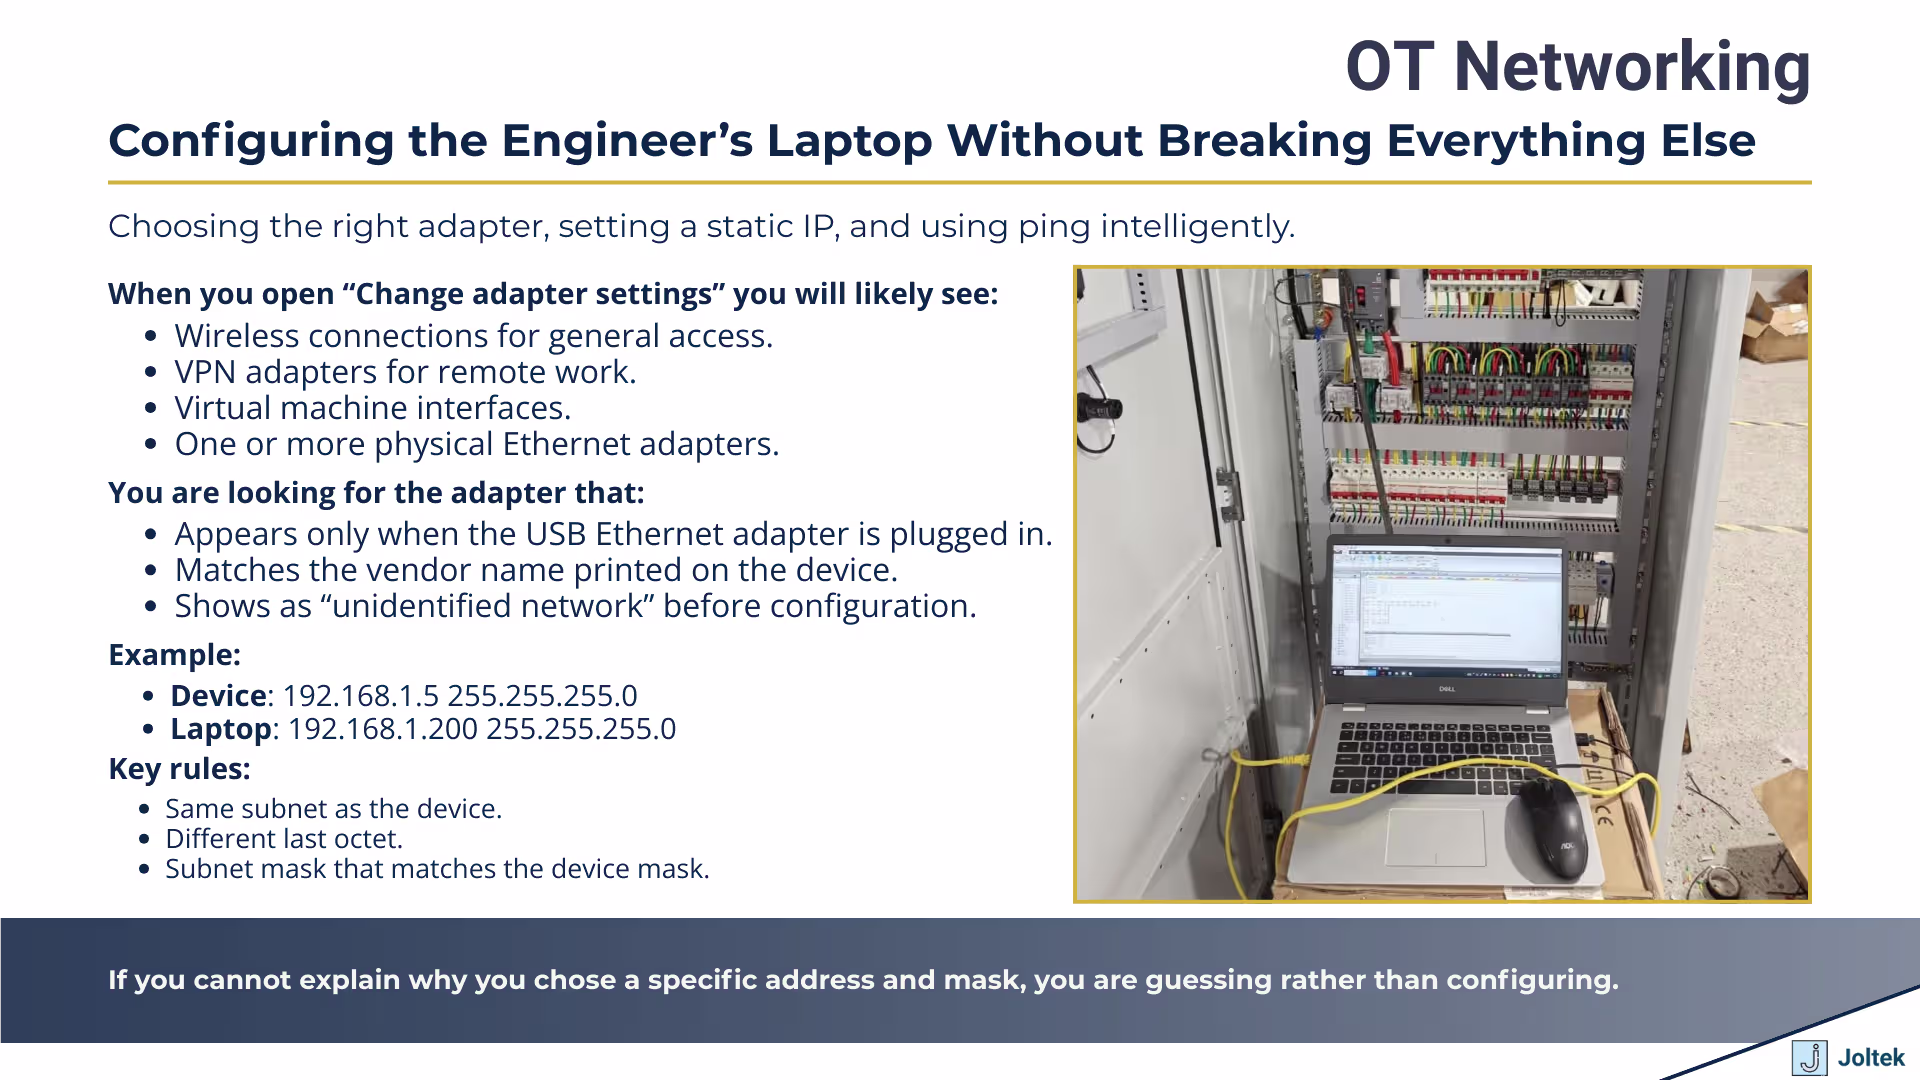
On a clean personal laptop with only a wireless and a single Ethernet port, identifying the correct adapter is trivial. On an engineer’s machine that has worked at multiple sites, the list is often much more complex. You might have several VPN clients, virtual machine adapters, previous USB Ethernet interfaces, and sometimes vendor specific tunnelling interfaces. When you open the Network and Sharing Center and then the adapter settings, you can easily see a page full of options that all look similar at first glance.
The key is to work systematically. You know you have just plugged in a specific USB to Ethernet adapter, so you look for the entry that corresponds to that device. It may include the vendor name, such as a particular chipset or brand, or it may simply show up as a new local area connection that appears when you plug it in and disappears when you remove it. You ignore Bluetooth entries, wireless connections, and VPN tunnels. You focus on the physical Ethernet interfaces. Taking the time to positively identify the correct adapter before changing settings prevents you from breaking your own connectivity to the outside world or disrupting other tools on your laptop.
Once you have the right adapter, the rest of the process is straightforward. You open the properties, select Internet Protocol version four, and move into the IP configuration screen. There you will see the choice between obtaining an IP address automatically and using a static address. For OT work with direct device connections, you almost always choose a static address that you configure manually.
If you want to see how this fits into a broader workflow that includes connecting PLCs into SCADA software, there is a detailed example in the article on connecting an Allen Bradley PLC to Ignition at connecting an Allen Bradley PLC to Ignition.
The device in the lab example is configured at an address in the one hundred ninety two dot one sixty eight dot one dot seven range with a subnet mask of two fifty five dot two fifty five dot two fifty five dot zero. To talk to it directly from your laptop, you need to place your adapter in the same subnet without reusing the exact address. In practice that means choosing something like one hundred ninety two dot one sixty eight dot one dot ten with the same subnet mask. The first three octets match, which means the devices consider each other part of the same local network. The last octet is different, which prevents a conflict.
After you enter those values and confirm them, Windows applies the settings to that adapter. At this point you can open a command prompt and issue a ping to the device address. If everything is configured correctly and there are no physical issues, you should see replies. That confirms that at least basic network connectivity exists between your laptop and the drive. Ping is not a complete test of application level communication, but it is the fastest way to prove that your addressing, adapter choice, and cabling are fundamentally correct.
It is worth remembering what ping does and does not tell you. A successful ping means you have layer three connectivity. It does not guarantee that higher level protocols such as EtherNet IP, Profinet, or a vendor specific configuration tool will work. Firewalls, disabled services, or misconfigured device settings can still block those. However, if ping fails, there is no point in trying anything else until you resolve the addressing or physical layer problem. Over time this sequence becomes muscle memory. Set the device address, configure the laptop, ping the device, then move on to the tools that configure or monitor it.
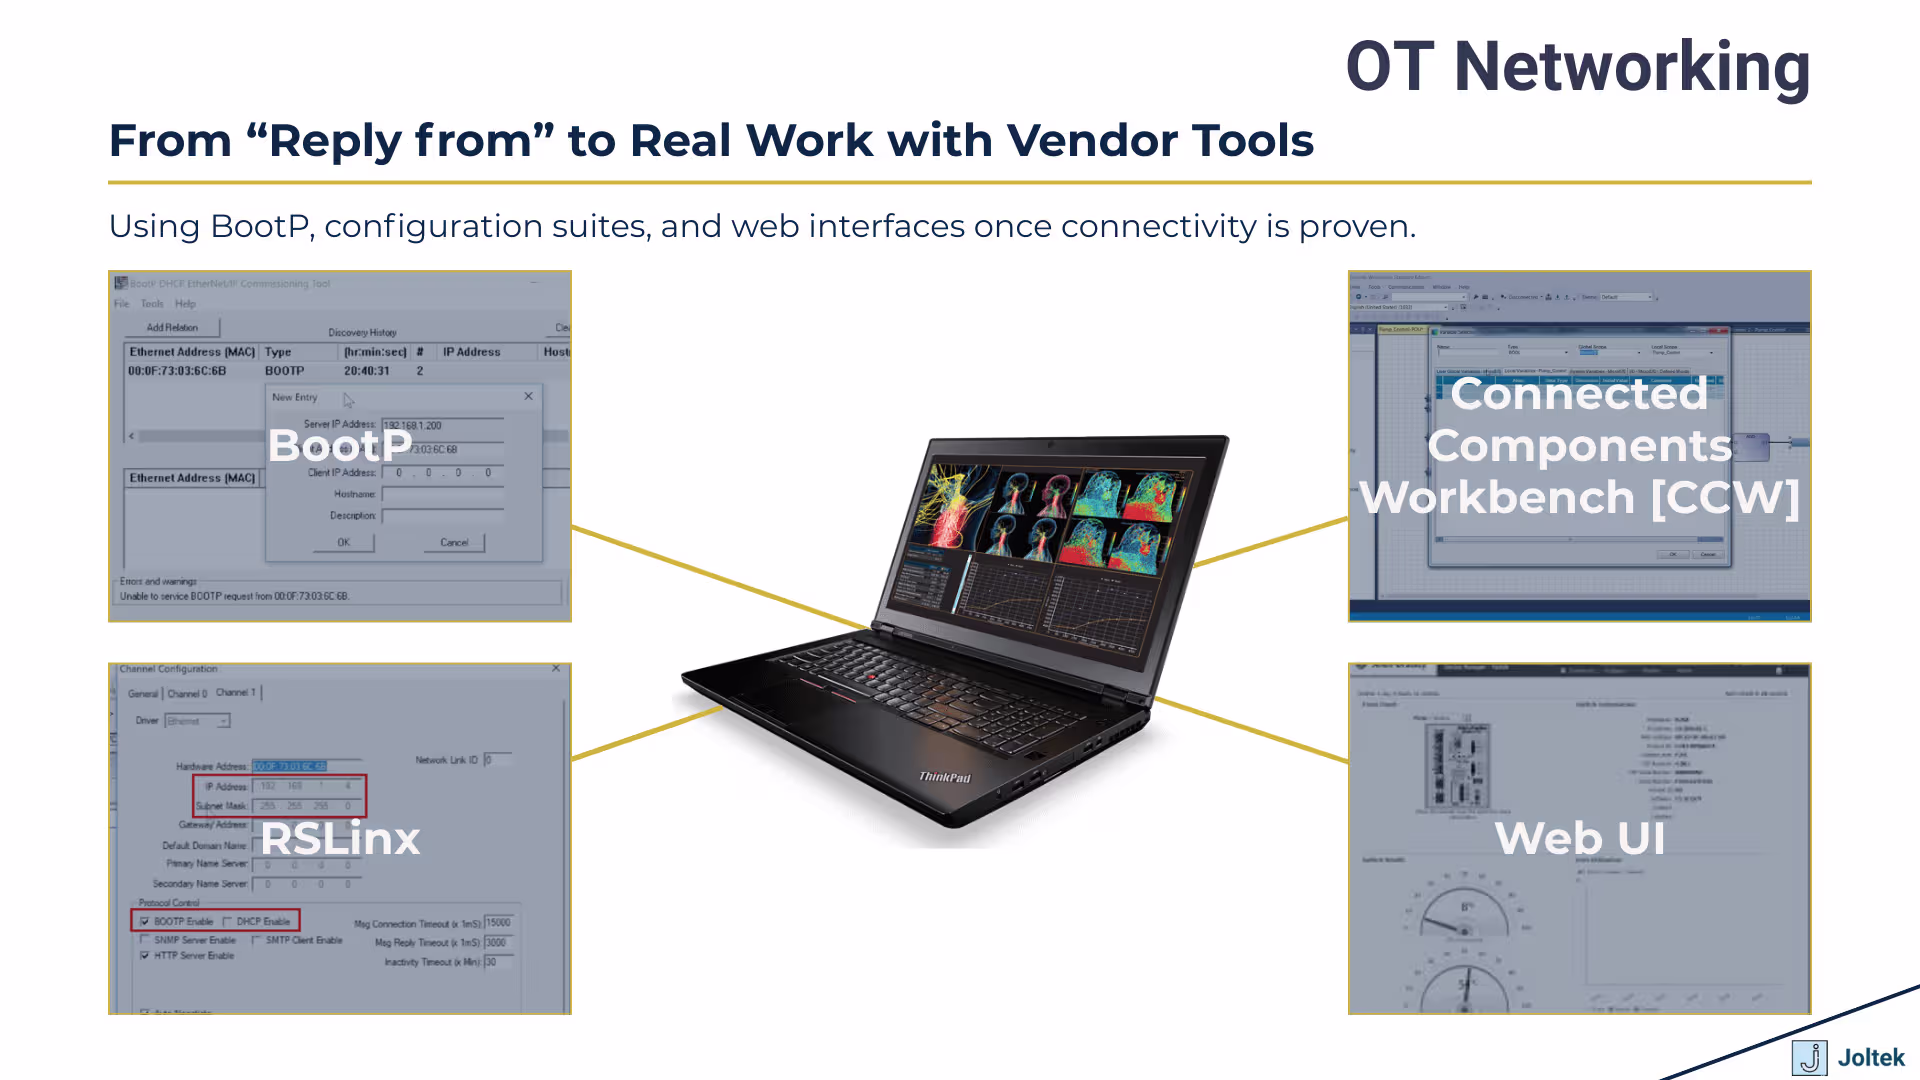
Once you have proven basic connectivity, you can start using the tools that were designed to do real work with the device. Different vendors provide different utilities. In the Rockwell ecosystem you may use BOOTP to assign addresses to devices that ship without a fixed configuration. You might use RSLinx as a communication layer for programming software. You might connect to the drive with Connected Components Workbench for parameter management. Other devices expose a simple web interface where you can log in with a browser and verify settings directly.
Each of these tools builds on the same foundation. None of them can talk to a device that you cannot ping. That is why the first part of the lab focuses so heavily on addressing and adapter configuration. Once that is solid, you can use vendor tools for deeper work such as changing control parameters, setting up diagnostics, or updating firmware. As you move into more advanced topics like historian connections, SCADA integration, or MES data flows, those tools become part of a larger chain that starts with this very basic ability to communicate with the hardware in front of you.
Connecting to a single drive once is useful. Doing the same process across multiple devices and vendors is where the real learning happens. The steps are always the same. You identify the hardware, find and read the documentation, locate the MAC address and relevant labels, configure the device address, set your laptop adapter to match the subnet, and prove connectivity with a ping. Then you open the appropriate tool and work with the device itself.
As you repeat this on different equipment, your confidence grows. You stop being surprised by new hardware because you recognise the patterns. You know where to look in manuals. You know how to interpret parameter tables. You know how to recover when something does not respond the way you expect. The more often you go through this workflow, the less intimidating larger OT networking projects become, because you understand that they are built out of many small connections that all follow the same rules.
At that point you can start thinking about how these individual connections contribute to wider data strategies. When several devices all report into a local SCADA system, when historians begin to collect time series data, and when plant level dashboards display performance metrics, it is all built on top of the same network fundamentals. For a deeper dive into that side of the conversation, including how local data access scales into plant and enterprise visibility, you can explore the article on unlocking industrial data in manufacturing at unlocking industrial data in manufacturing.
The first lab in OT networking is not about impressing anyone with complicated architectures. It is about proving that you can take a laptop, a single device, and a small amount of documentation, and turn that into a reliable connection. You learn to respect the hardware, to work safely, and to be deliberate about which port you use. You discover how much value there is in reading the network section of the manual before pressing buttons. You see how critical it is to choose the correct adapter on your laptop and assign a static address intentionally.
Once you can do all of that consistently, you have something much more valuable than a checklist. You have a way of thinking about communication that applies everywhere in OT. Whether you are connecting to a drive in a test stand, a PLC in a packaging line, or a switch in a control room, you are still following the same pattern. Understand the device, configure the address, confirm connectivity, then use the right tools to do the work that actually matters for production.
From here the journey continues into topics such as segmentation, VLANs, managed switches, and secure remote access. Those are important, and they will come. For now the focus is exactly where it should be. Get comfortable connecting your laptop to real industrial equipment. Build confidence with simple labs. Carry that mindset into the plant. The rest of OT networking sits on top of these fundamentals.

