
Use the exact entry ID so you land on the correct Siemens support article and avoid outdated forum posts or unofficial download pages. This is the cleanest path to the official trial files referenced in the video.
You should arrive at the Siemens Industry Online Support page that contains the trial download package for TIA Portal V21. Before downloading anything, make sure you are on the official Siemens support site and not a mirrored or third party page.

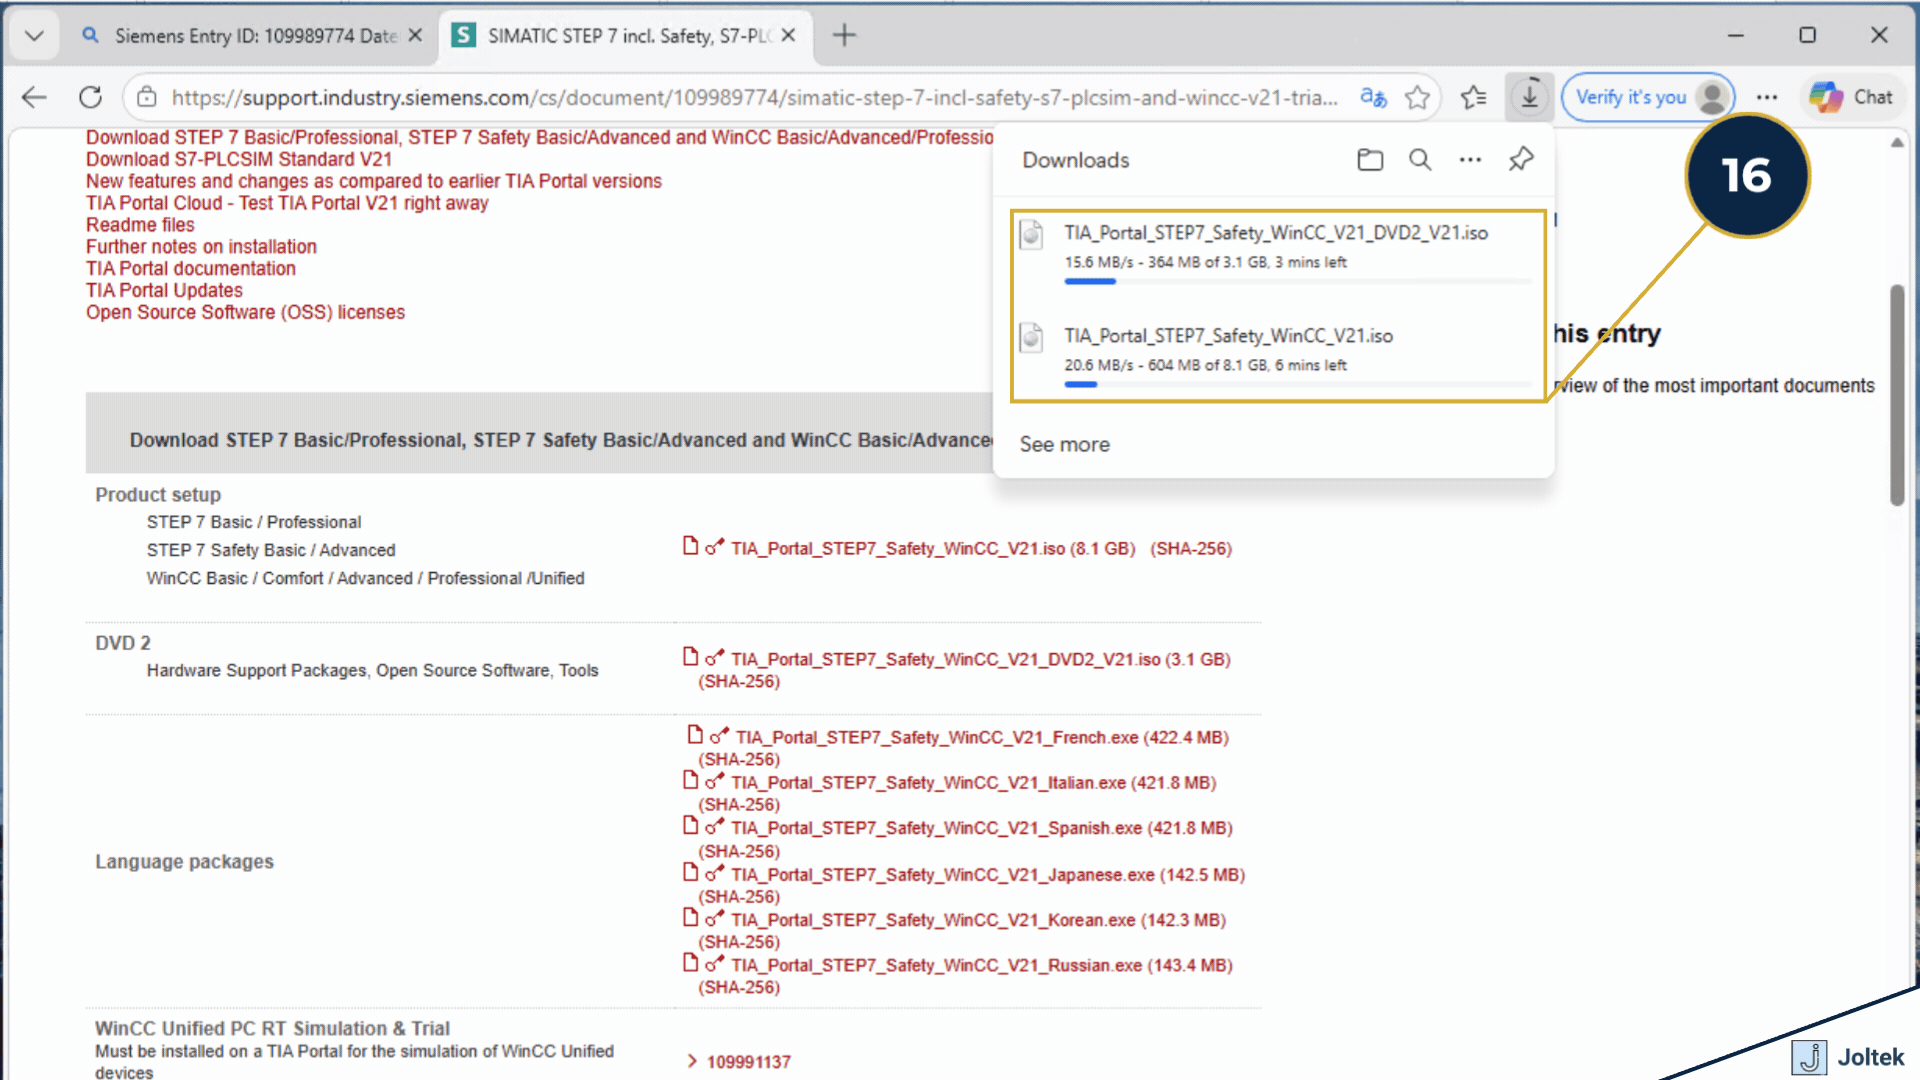
Both DVD 1 and DVD 2 are required for the full installation flow shown in the video. Keep both files in the same download location so they are easy to find once the installer requests the second disk.

If you already have a Siemens account, using it will save time and keep your download history tied to a single profile. This can be useful later if you need to revisit trial packages, language files, or additional Siemens software.
If you do not already have an account, create one before starting the downloads. Use an email you can access easily, since Siemens will send a verification code that you need to continue.
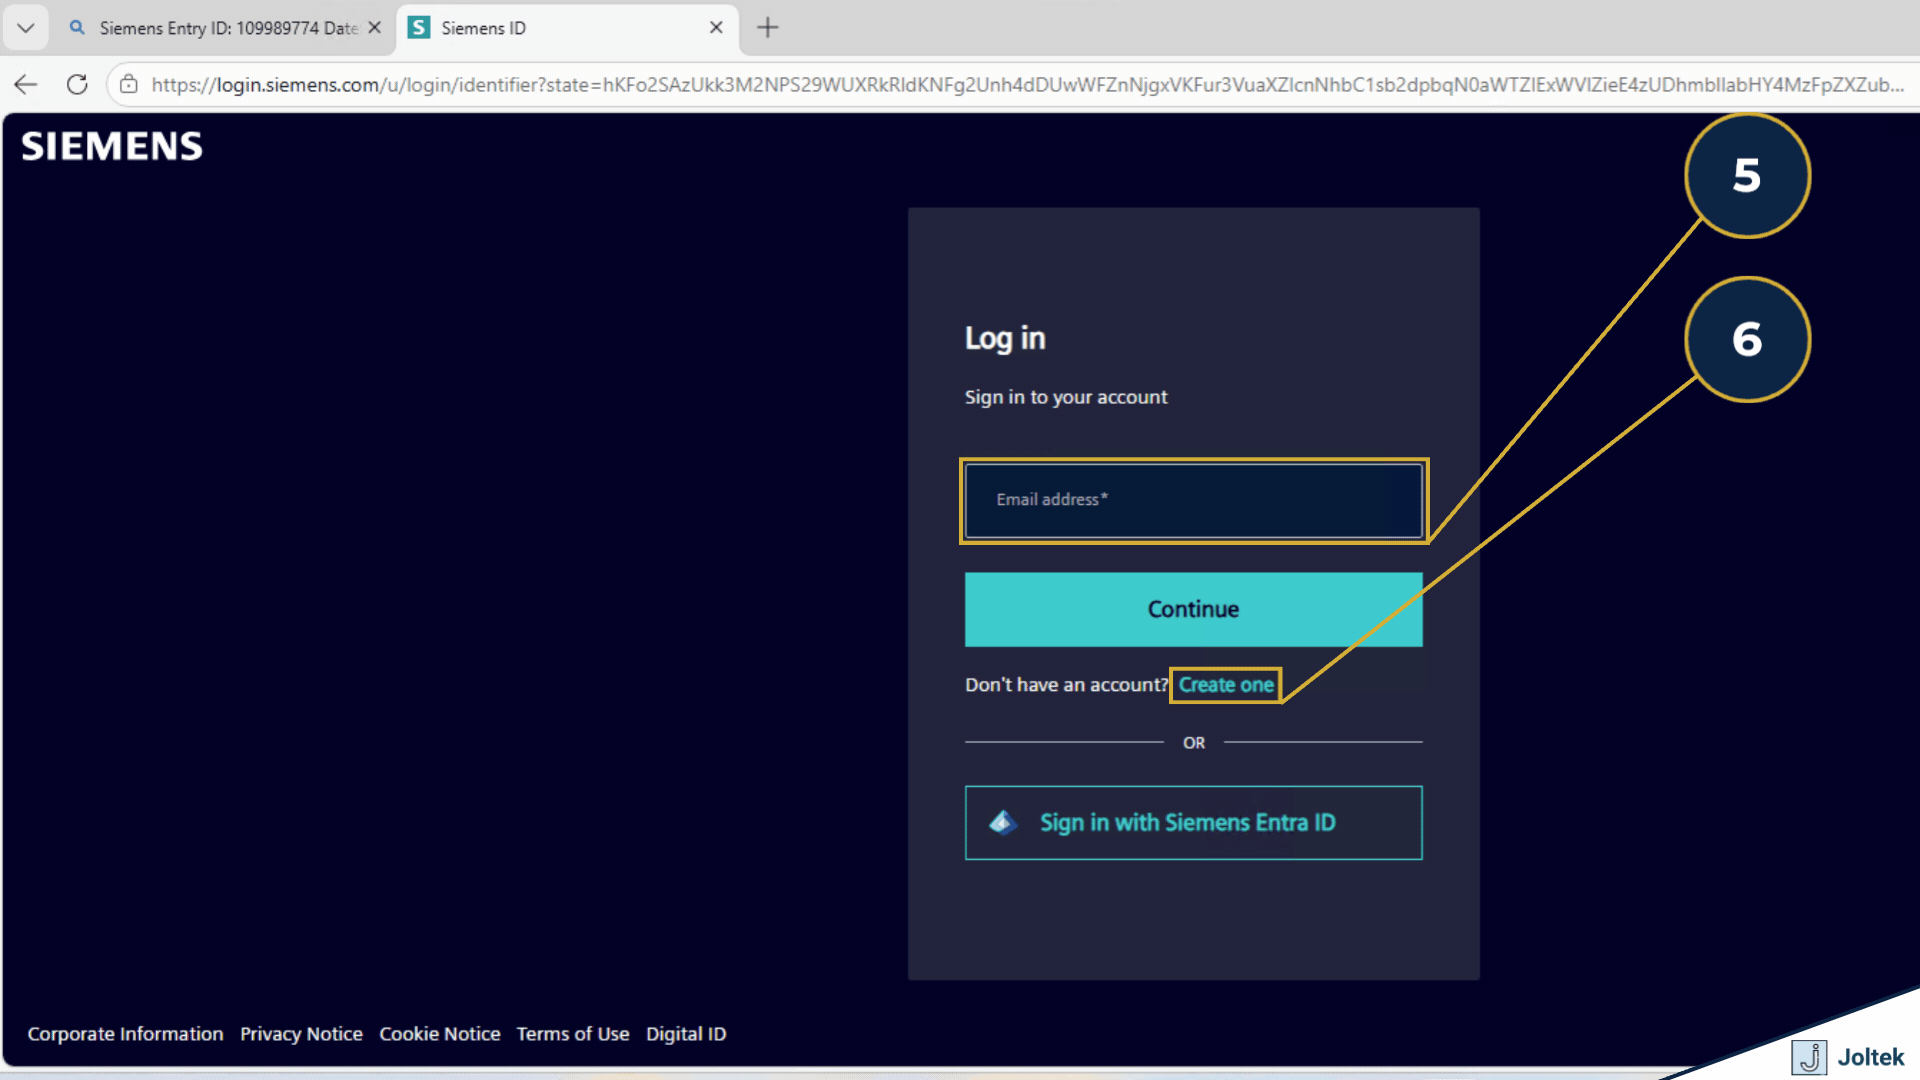
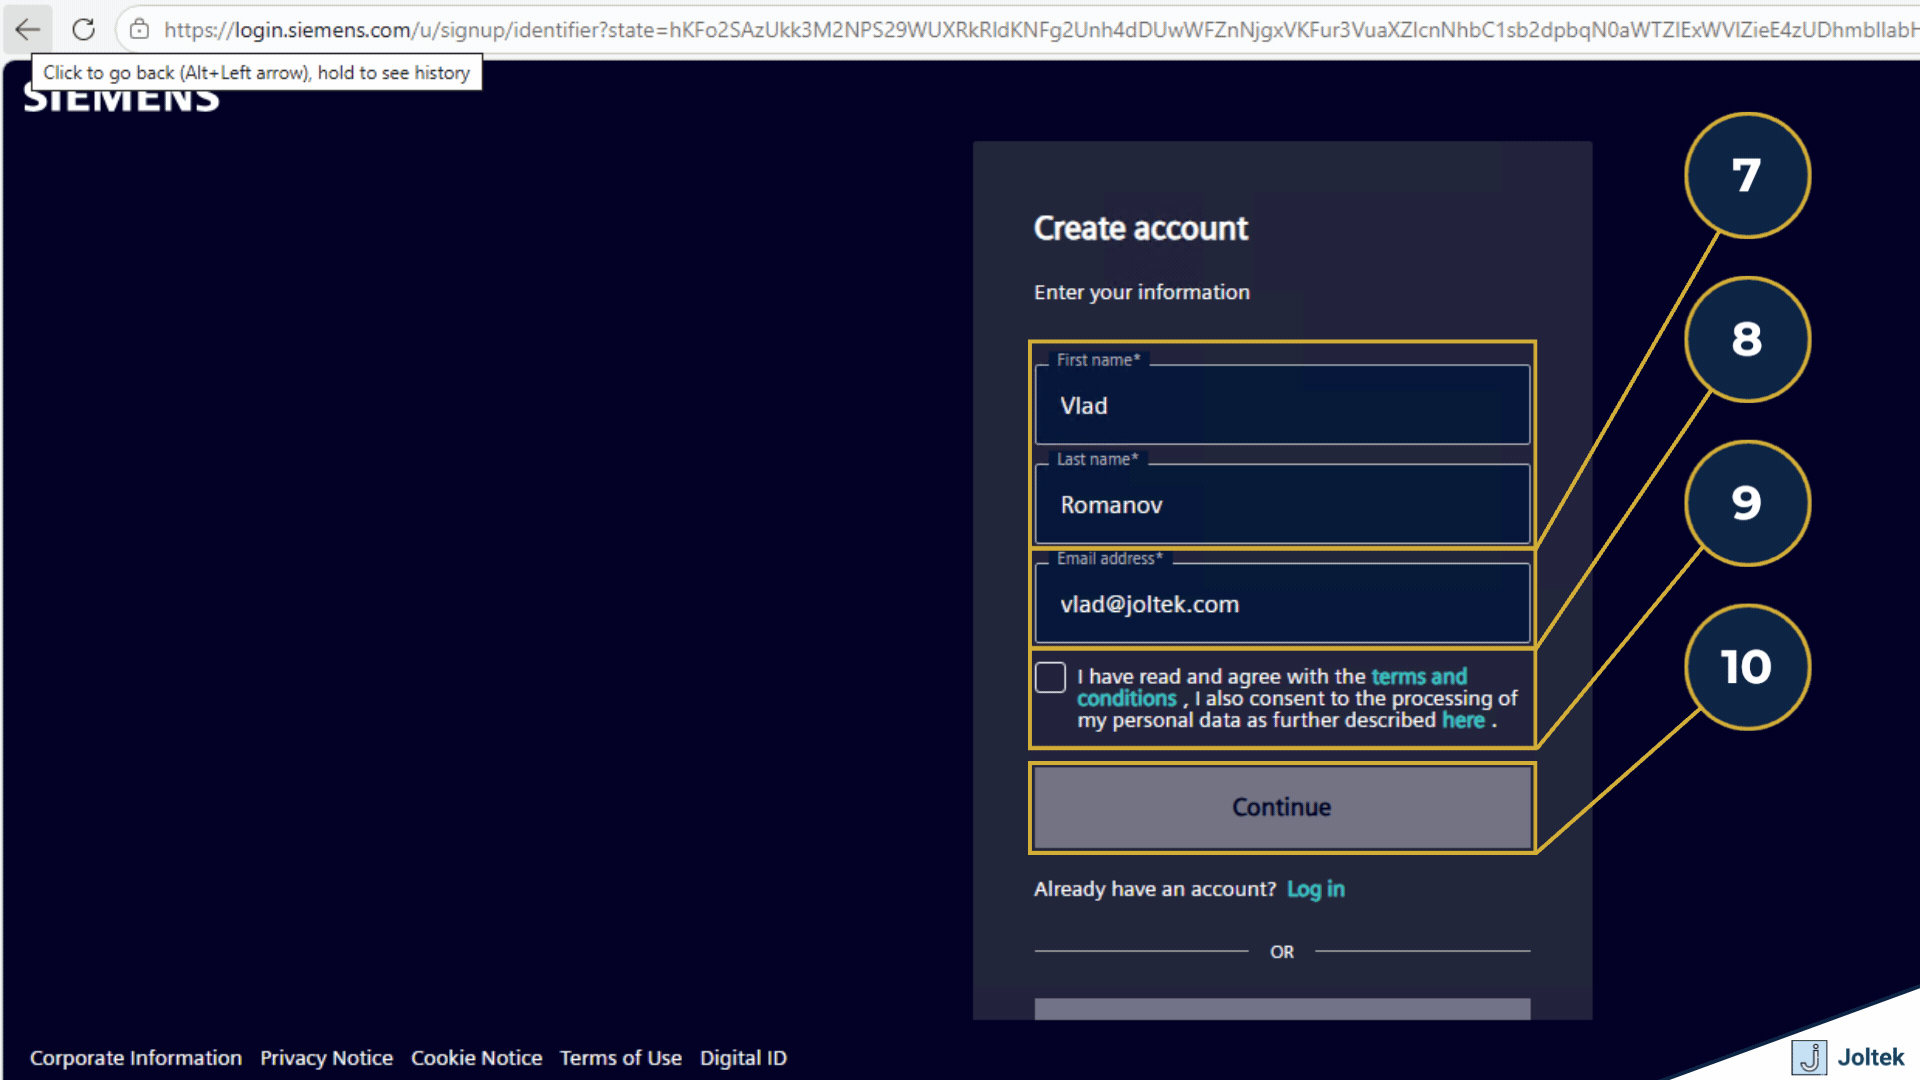
Use your real name or the name you want tied to the Siemens account. Keeping the profile accurate makes it easier to manage future downloads and support access.
Double check the spelling before continuing. If the email is wrong, the verification code will never reach you and you will lose time troubleshooting something simple.
Once you continue, Siemens will move you to the password creation and account verification flow. Keep the browser tab open during this process so you do not need to restart it.
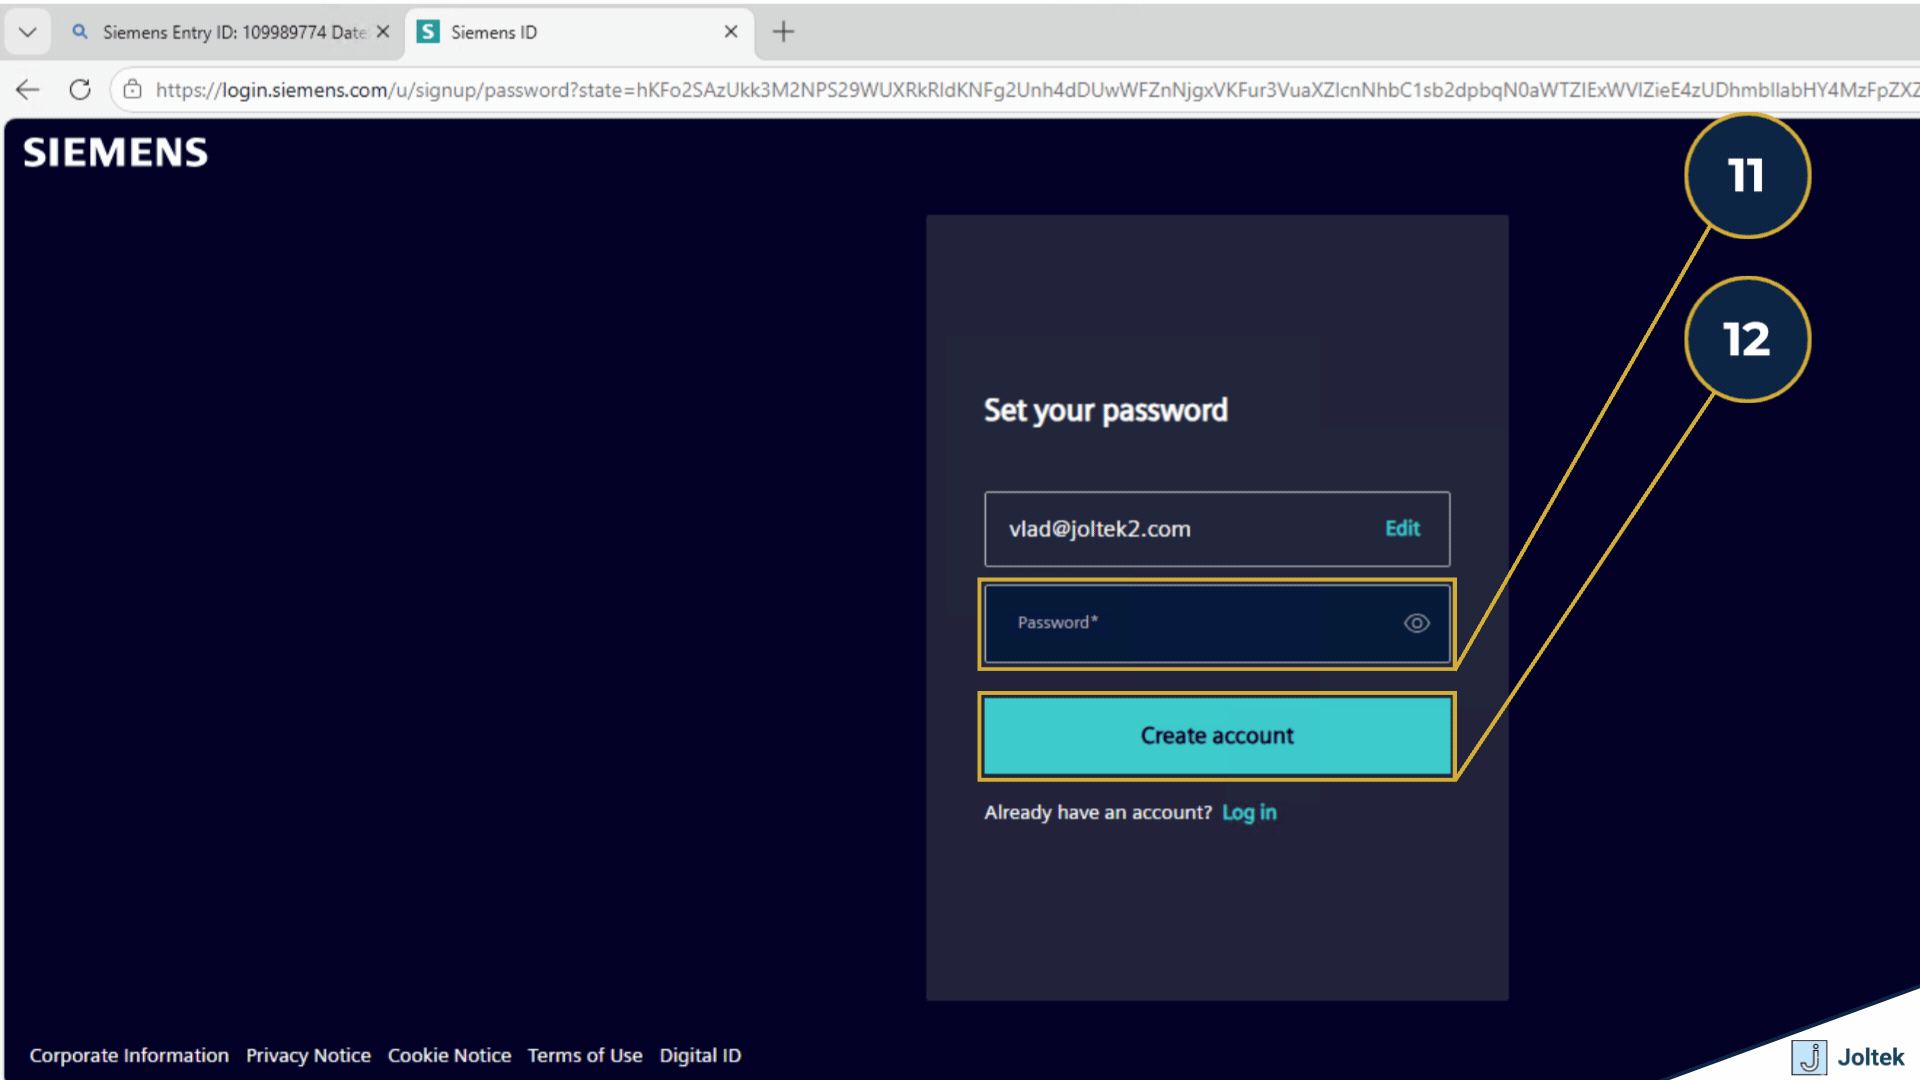
Use a password you can store securely and retrieve later. Since this account may be used for future Siemens downloads, updates, and support items, treat it like an engineering tool account rather than a throwaway login.
After this step, Siemens should trigger the email verification process. If nothing happens right away, check spam or junk folders before trying again.
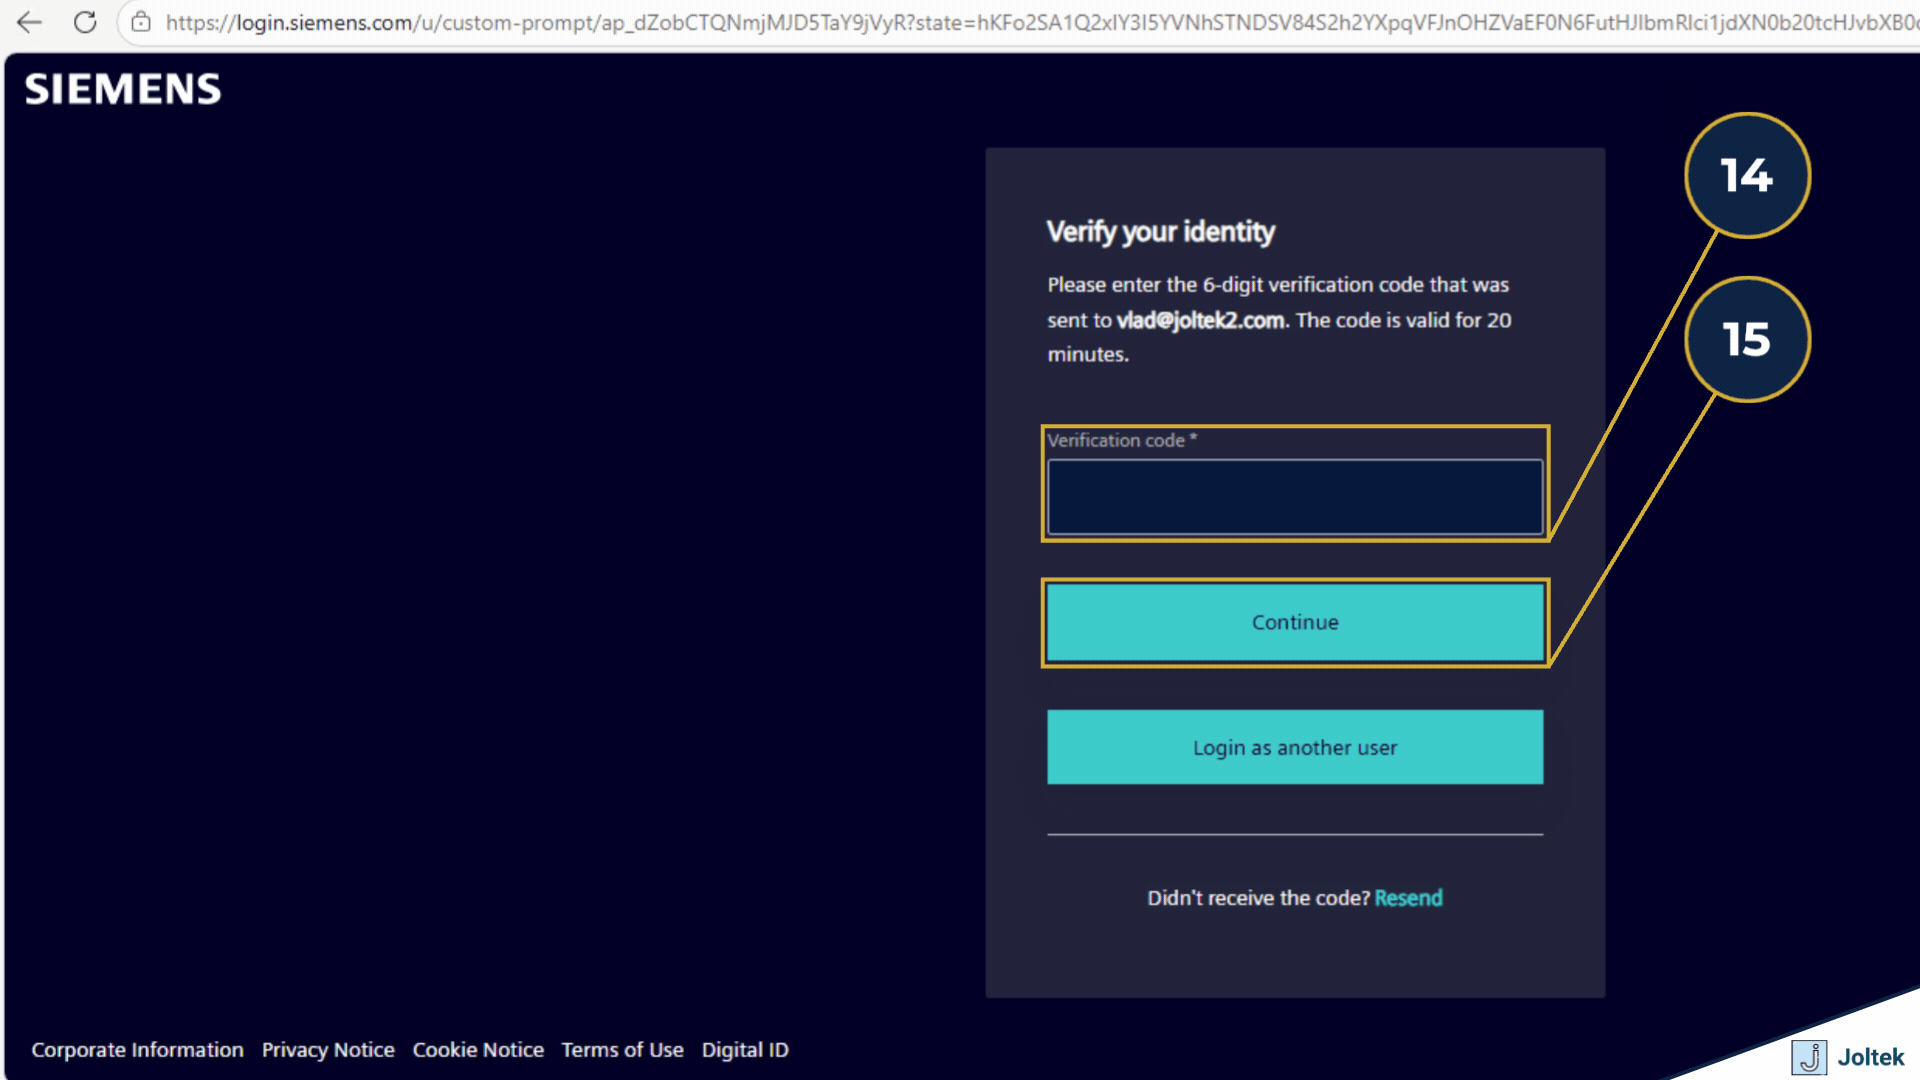
The verification code is what confirms the account and unlocks the download flow. It is a good idea to leave the Siemens page open while you check your inbox so you can enter the code immediately.

Enter the code exactly as sent. If the code expires or you typed the email incorrectly earlier, request a new one rather than forcing repeated attempts.
At this point the account should be validated and you can return to the support article to download the required files. Once authenticated, Siemens should let the ISO downloads begin normally.
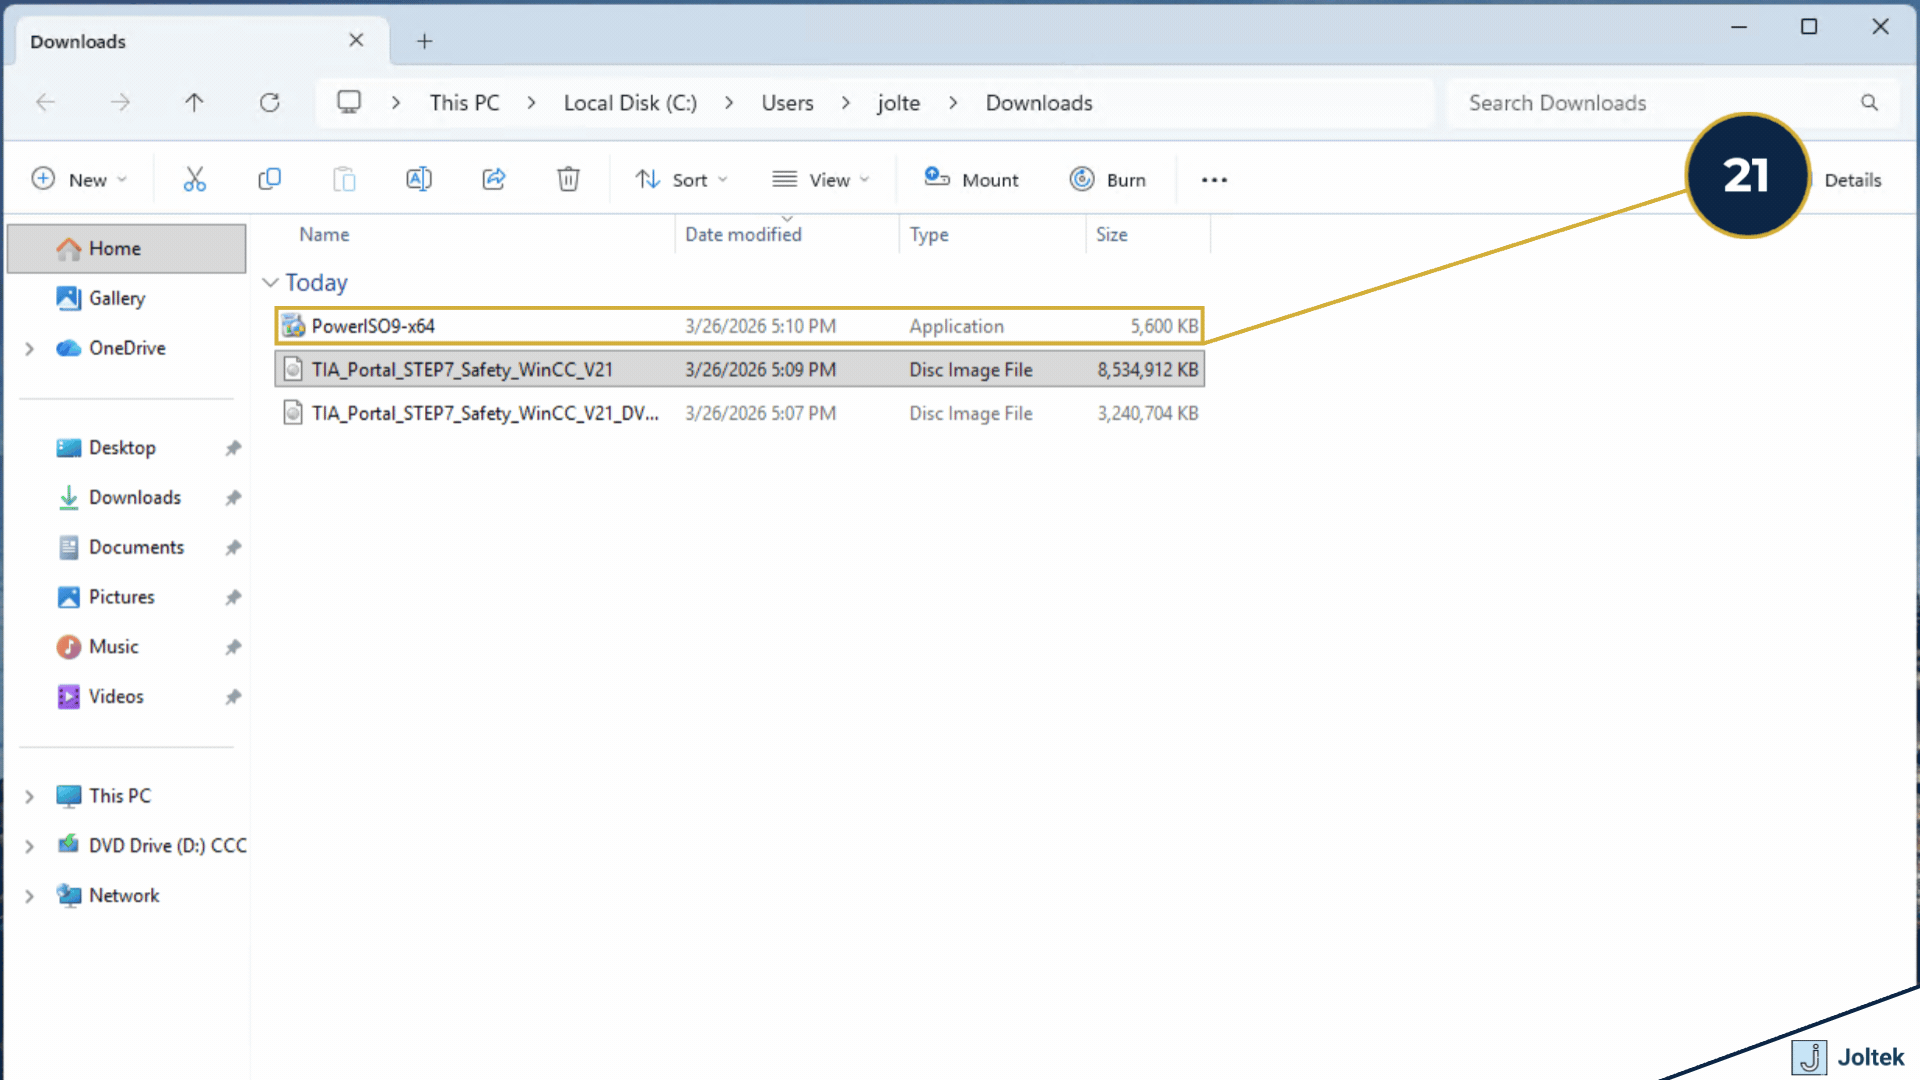
Before moving on, make sure both files are fully downloaded and visible in your Downloads folder. This saves time later because the installer will require the second image during the installation process.
This step is relevant to the workflow shown in the video, especially if you are working inside a virtual machine or on a system that does not already have a convenient ISO mounting method. On many Windows systems, ISO mounting may already be available natively, but this method keeps the process consistent with the walkthrough.
Make sure you land on the official PowerISO site before downloading anything. Avoid software aggregators when possible since they can add confusion or bundle extra installers.
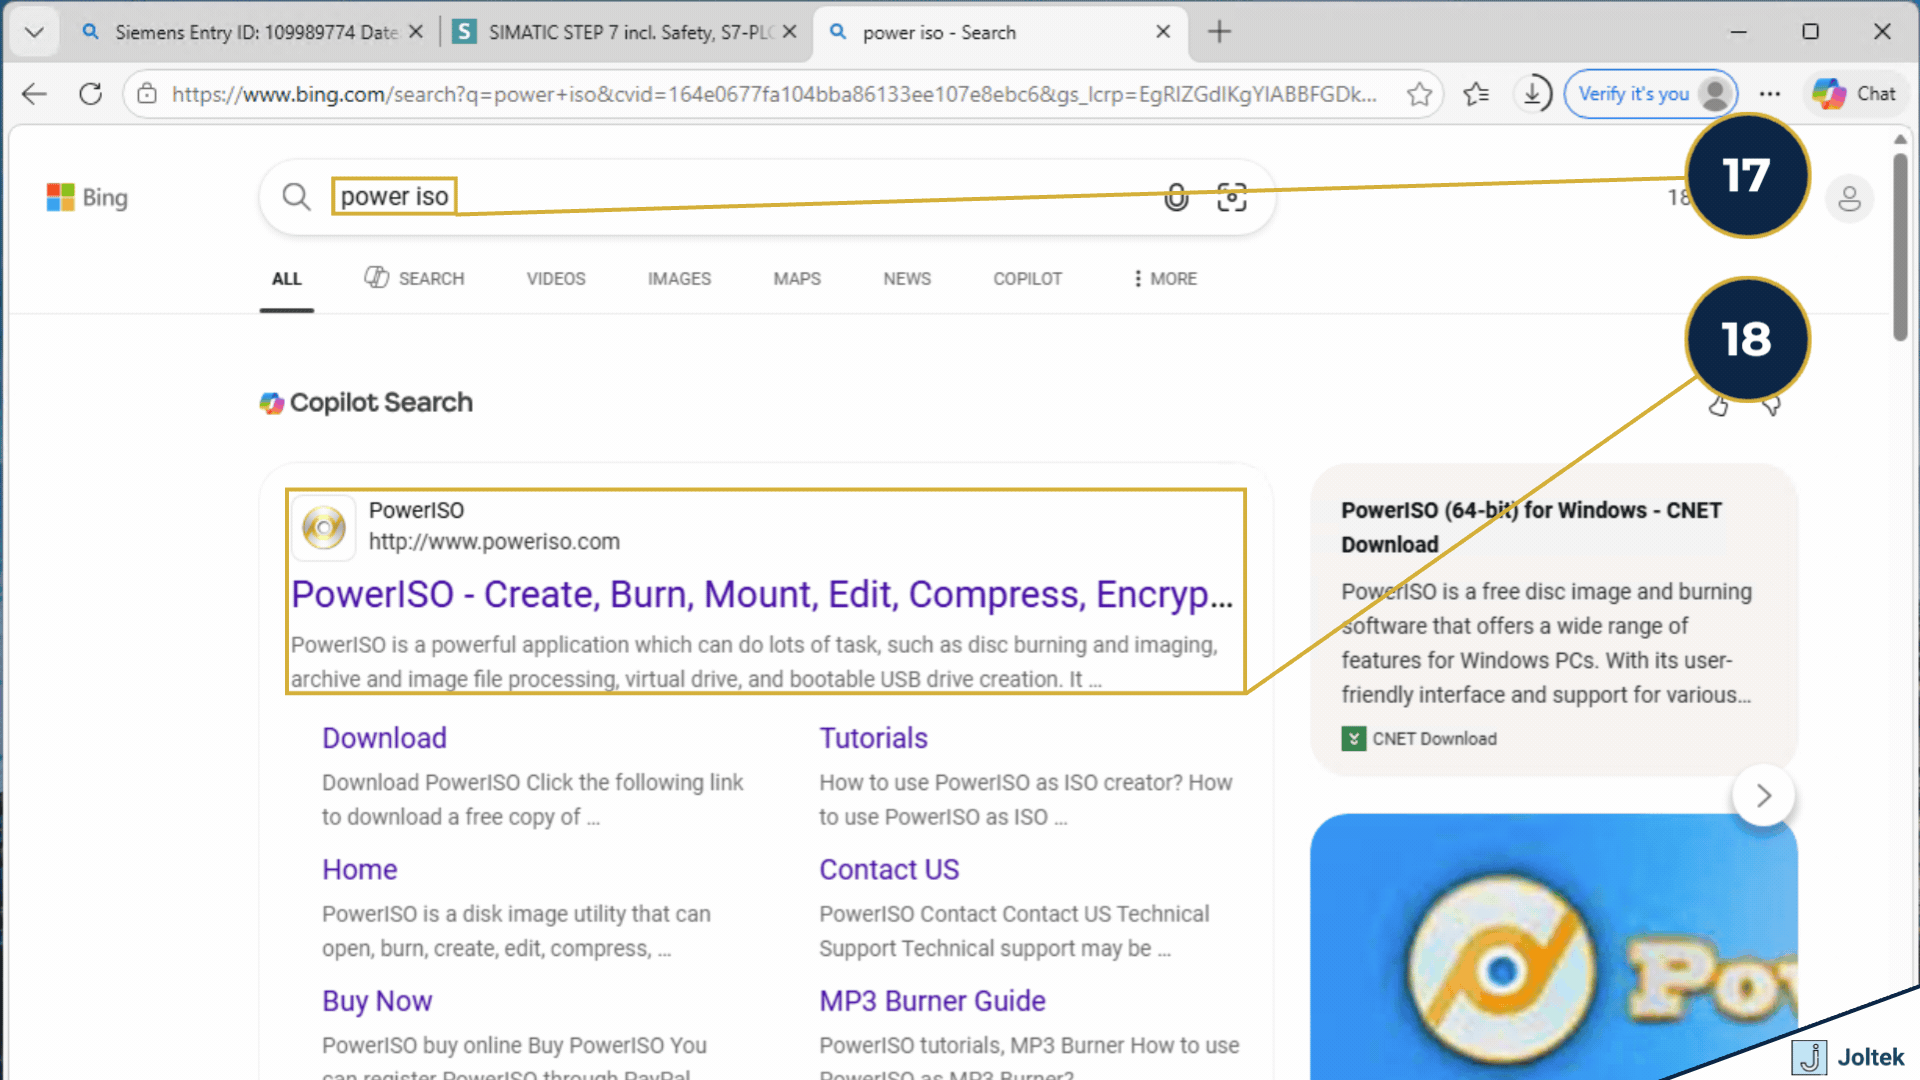
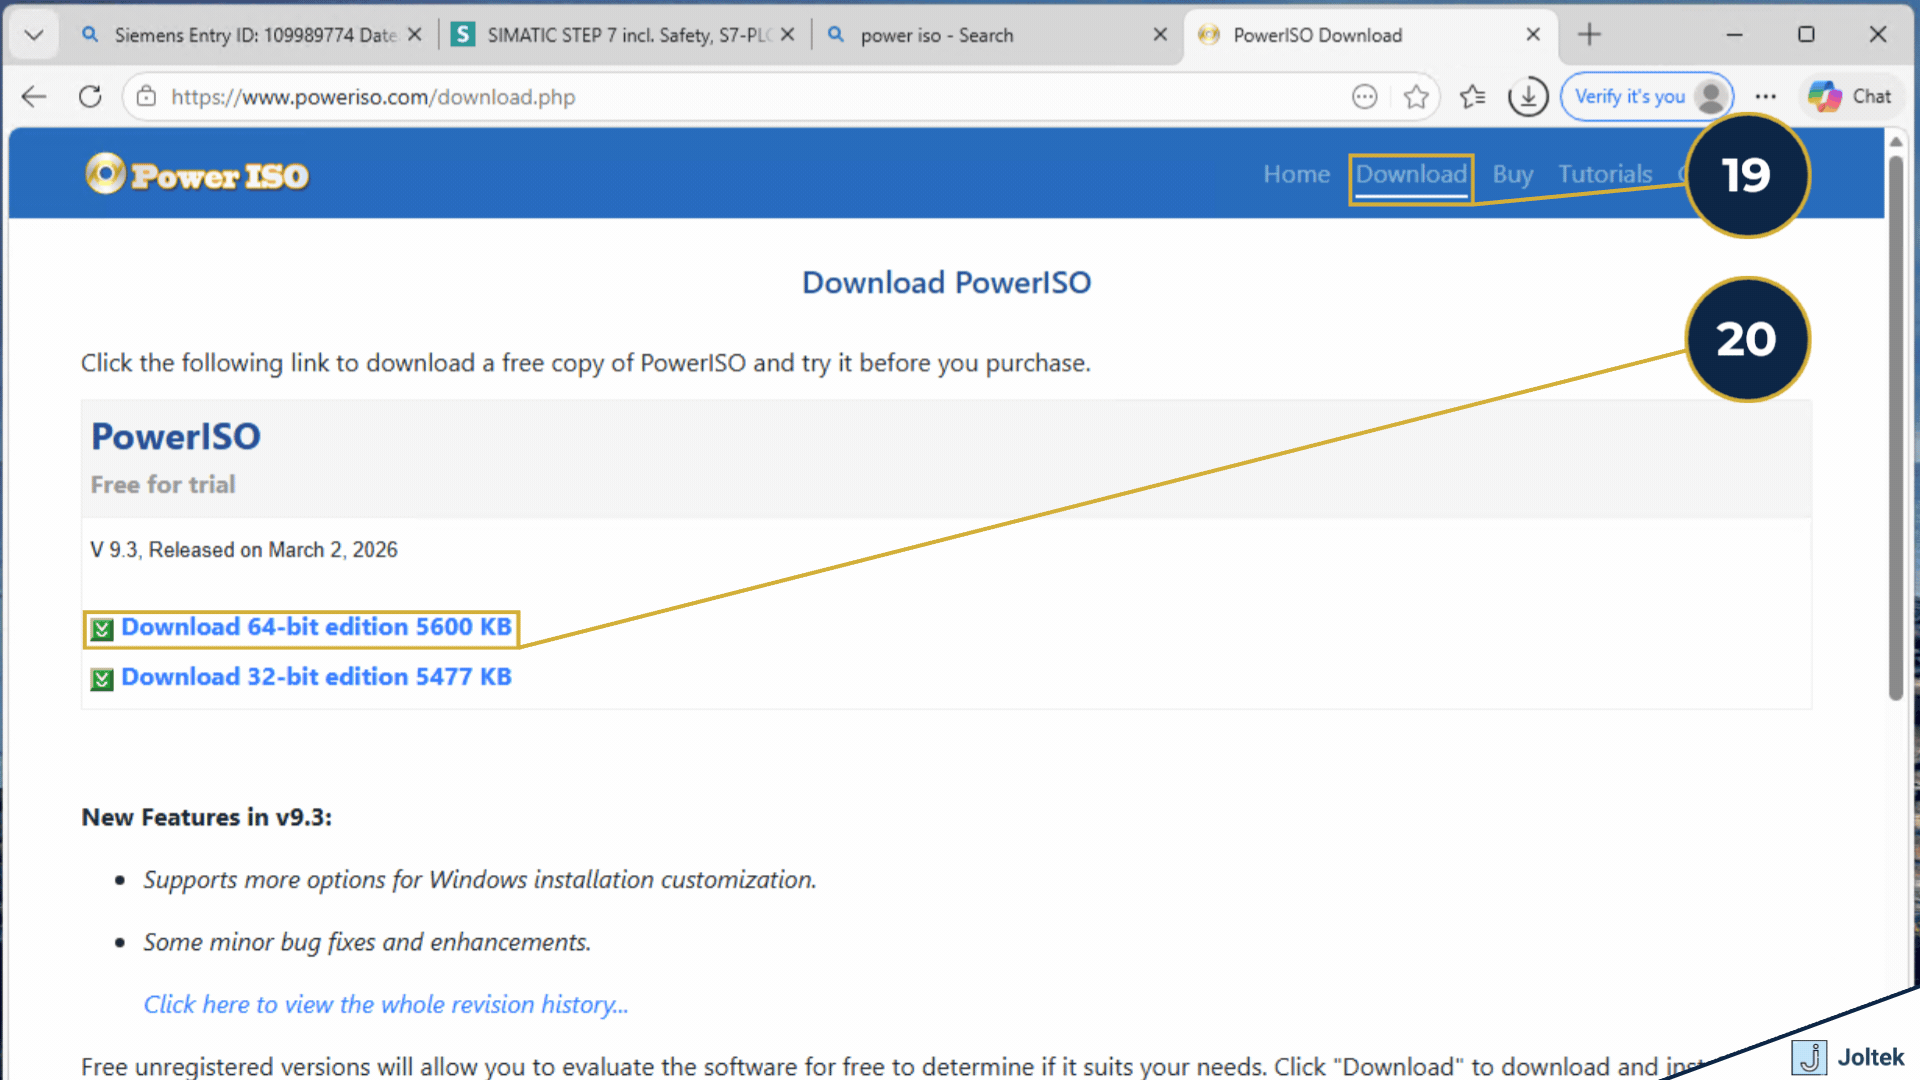
Go directly to the download section so you can grab the correct installer for your system. In this case, the goal is the 64 bit version for a modern Windows environment.
Choose the 64 bit installer unless you specifically know you are on a 32 bit system. For most modern engineering laptops and VMs, 64 bit is the correct choice.
Launch the installer after the download completes. Close unnecessary programs first so the install is as clean as possible and you reduce the chance of needing to repeat the process.
The default path is usually fine for this purpose. Unless you have a very specific software management standard on the machine, there is no need to overcomplicate this step.
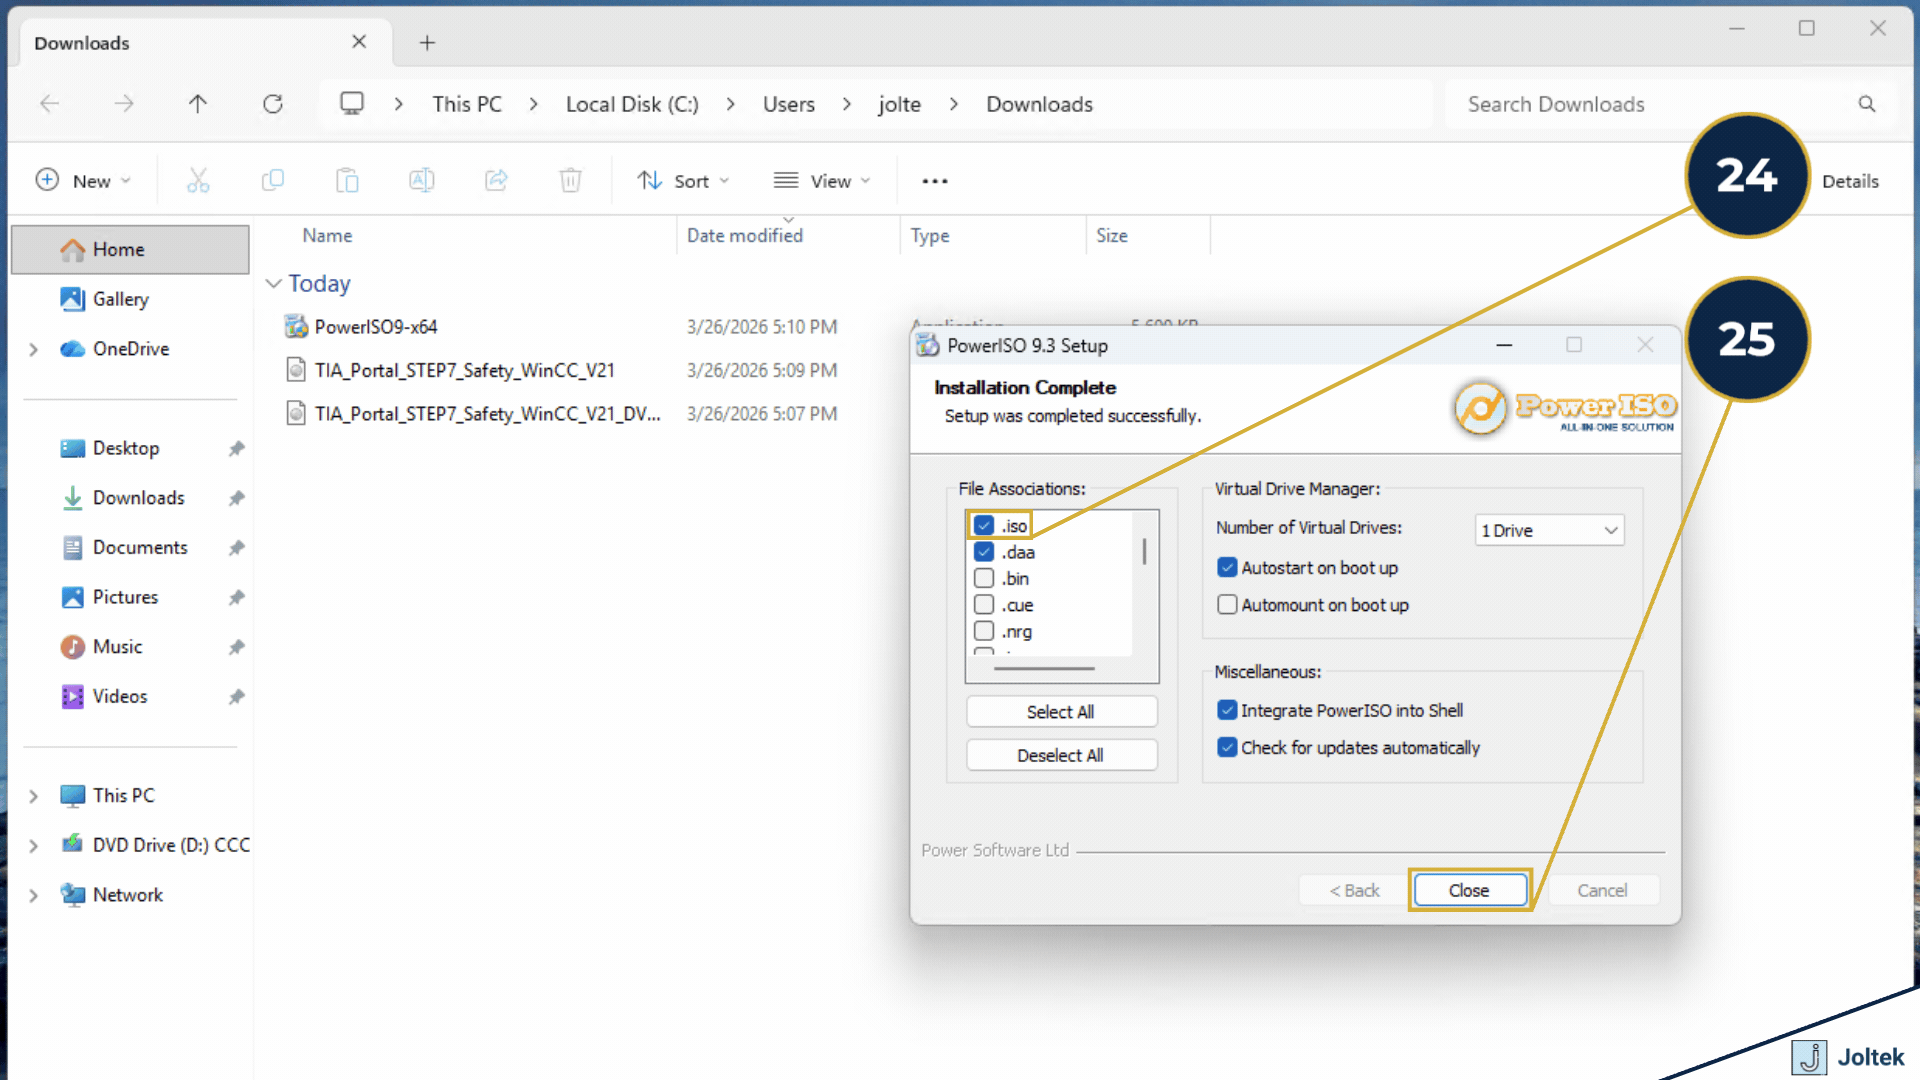
Let the installer complete without interruption. This utility is only being used here to mount the TIA Portal ISO images and get the installation media accessible to Windows.

This is important because it allows ISO files to open cleanly through PowerISO and makes the next steps simpler. If the association is skipped, you may end up having to browse manually for the mount function each time.
The reboot matters because it ensures the PowerISO virtual drive tools are properly registered with Windows. Skipping this can lead to confusion when the mount options do not appear as expected after installation.
Open the system tray area where background utilities are shown. This is where the PowerISO virtual drive manager icon is typically located after reboot.
You are looking for the small PowerISO tray icon that gives access to the mount options. If you do not see it right away, expand the hidden tray icons first.
The drive letter is not important as long as the ISO mounts successfully. Different machines and VMs will assign different letters depending on what other devices are already present.
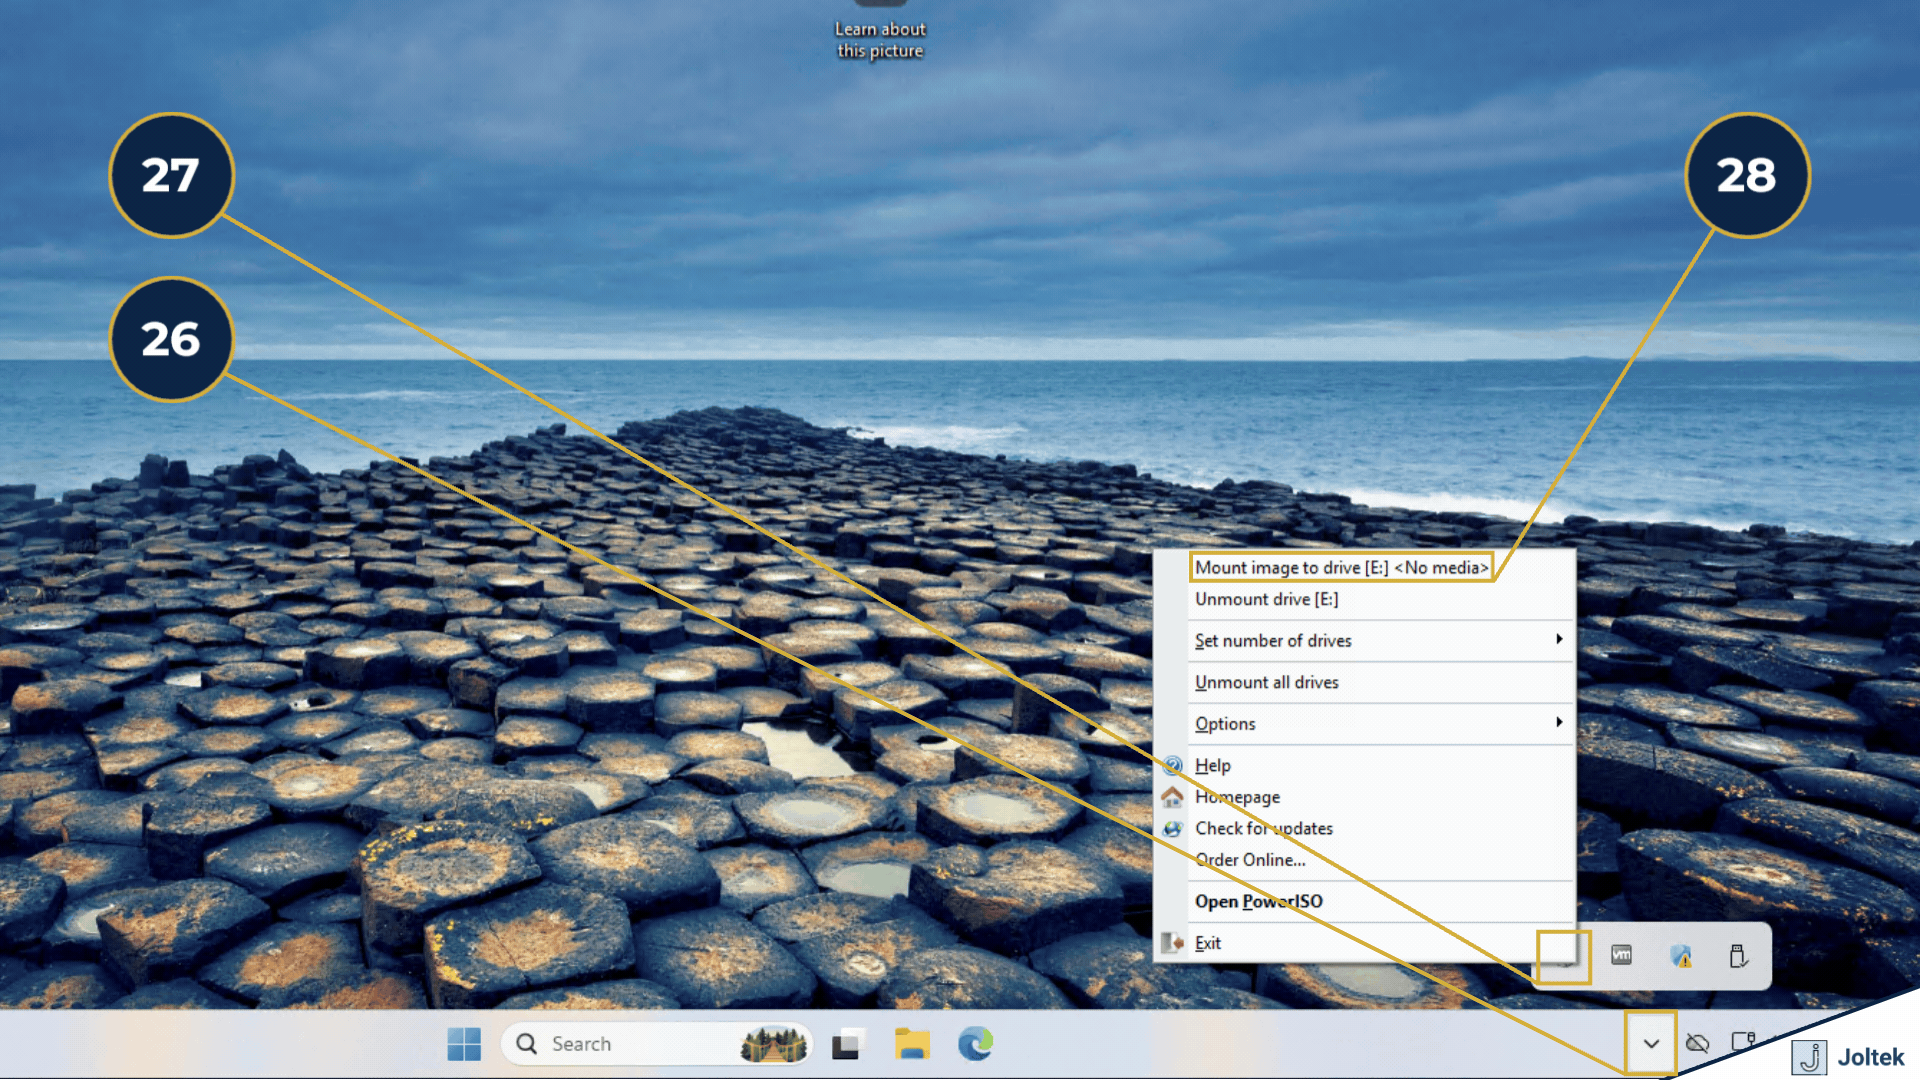
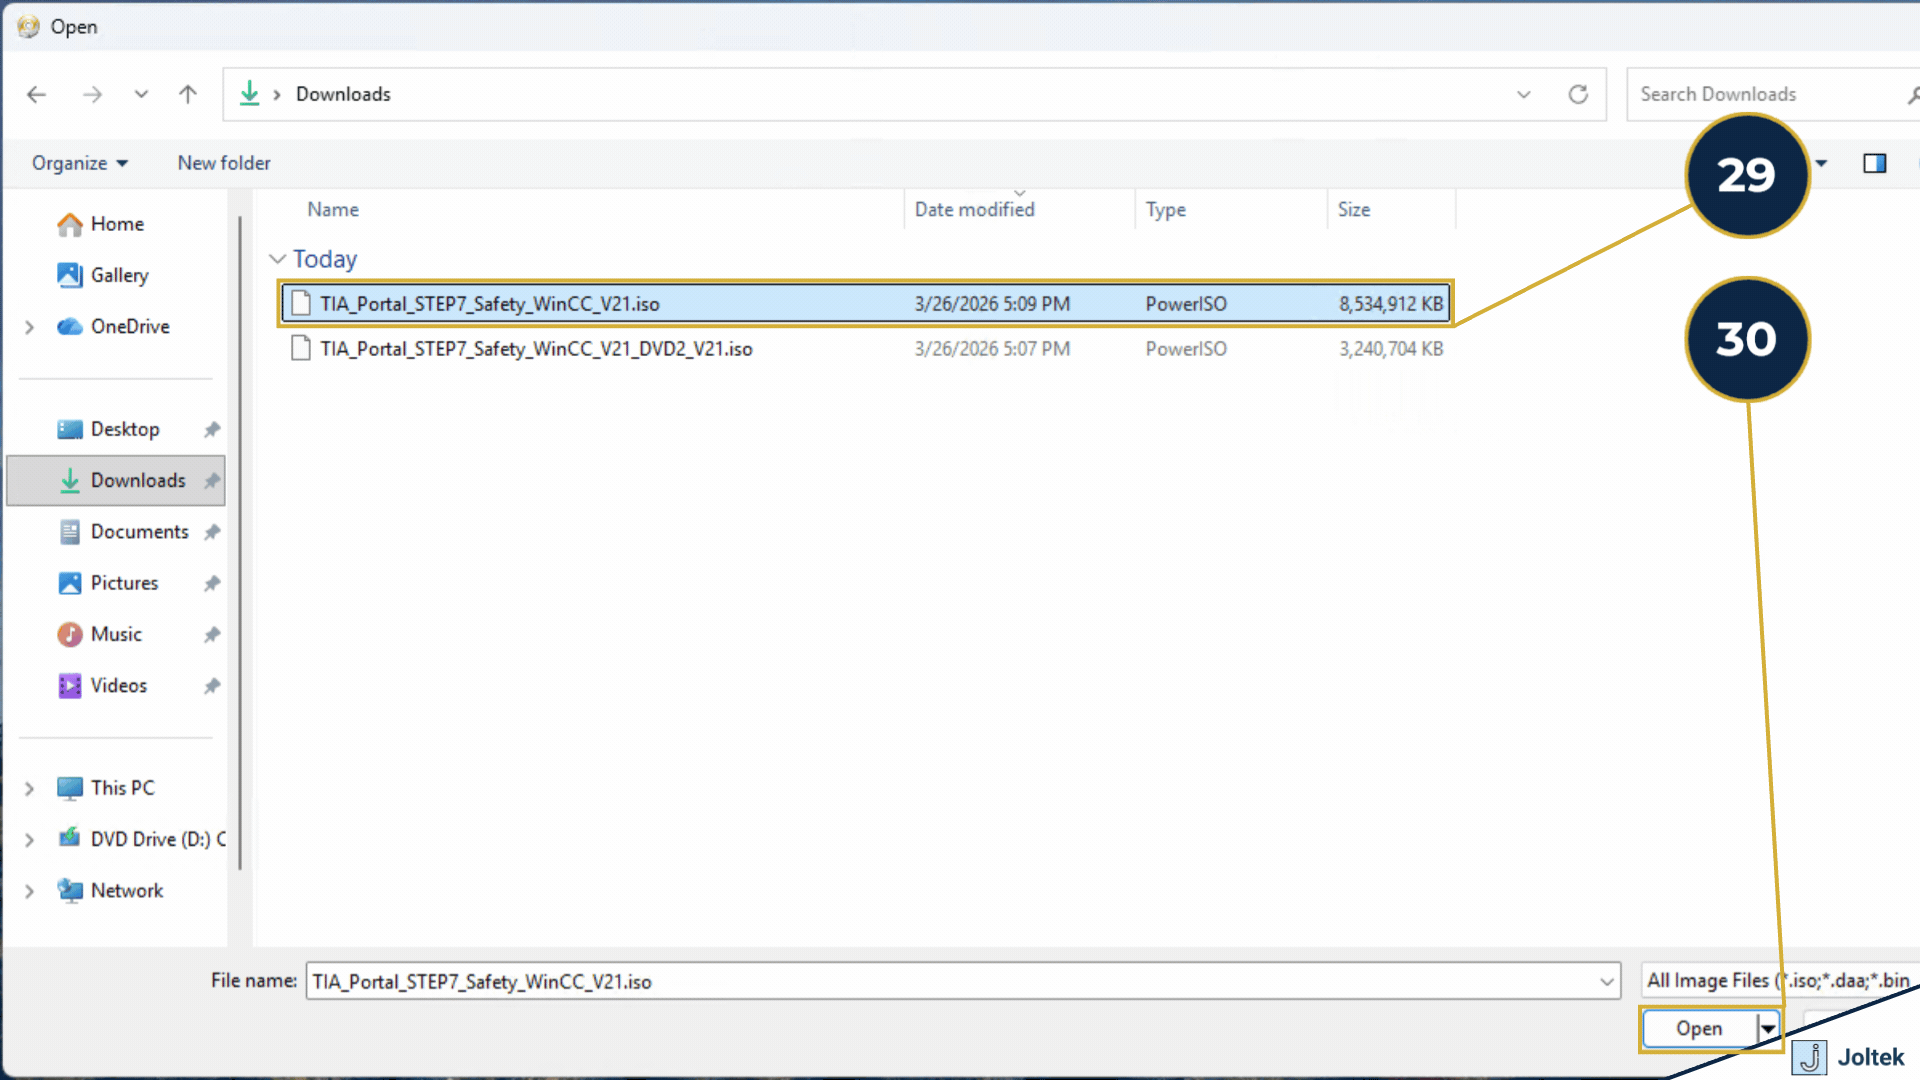
Start with DVD 1 first. This is the image that contains the installer launch point used in the walkthrough.
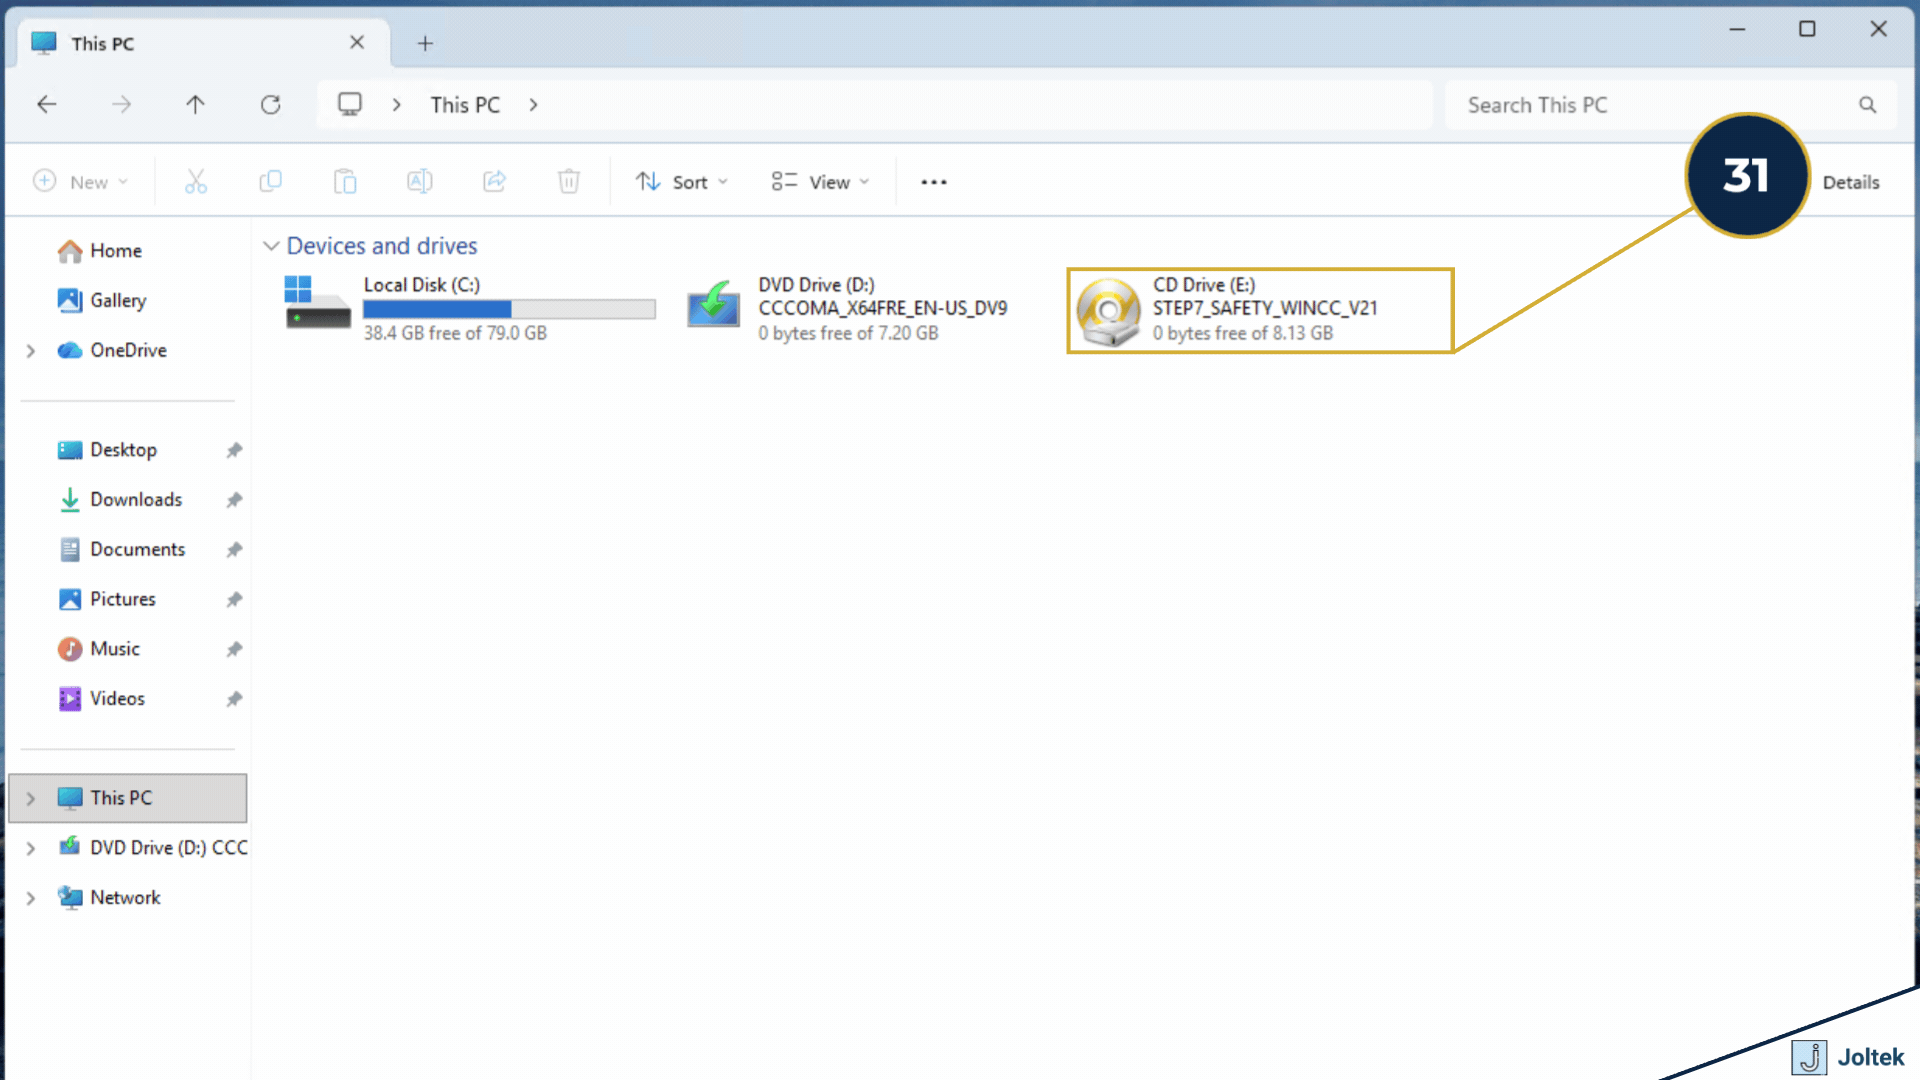
Once opened, the ISO should mount as a virtual disk inside Windows. You may not see a dramatic change immediately, so the next step is to check This PC and locate the new mounted drive.
You should now see the contents of the mounted TIA Portal media. This confirms the ISO mounted correctly and that Windows can read the files.
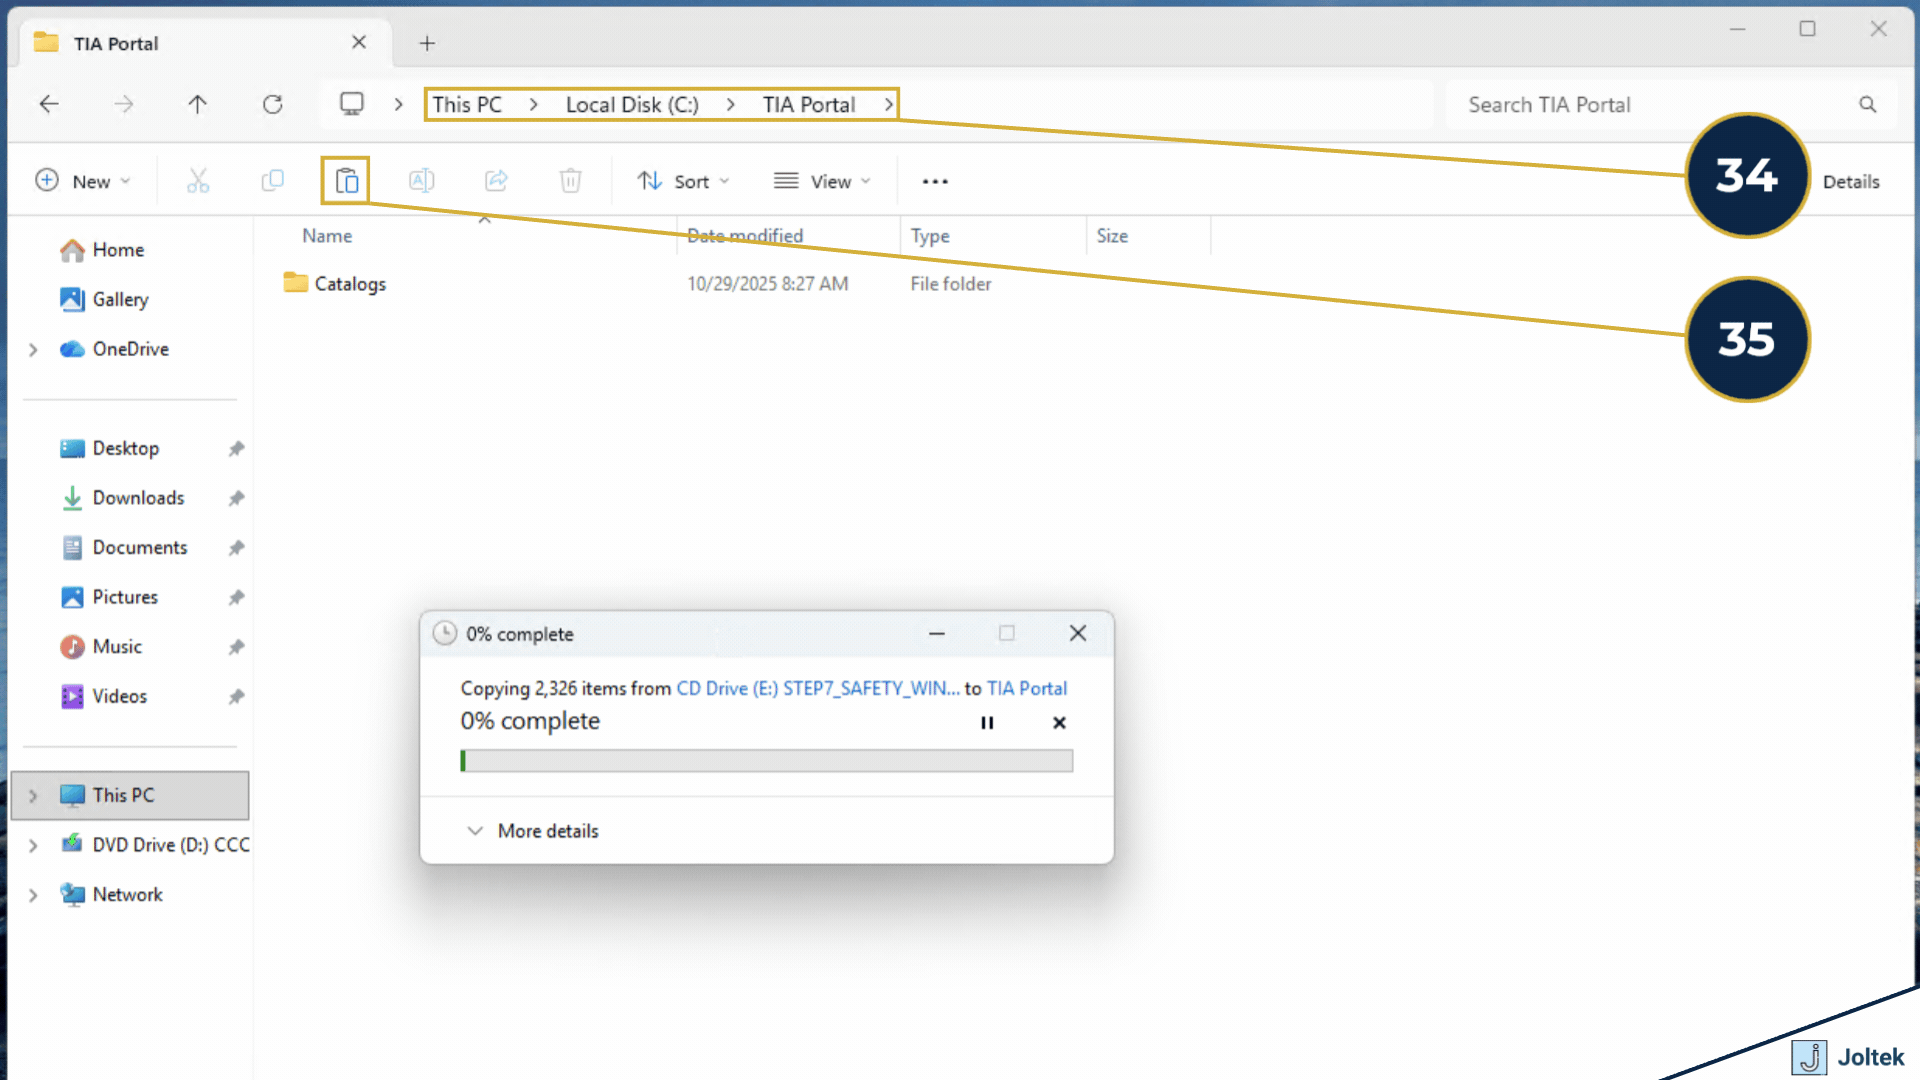
This is a key workaround from the video. Running directly from the mounted media can sometimes produce an “incorrect function” error, so copying everything locally first is the safer path.
Copying the full contents locally helps avoid media access issues during installation. It also tends to make the process smoother on slower virtual machines and more stable if the mounted drive disconnects.
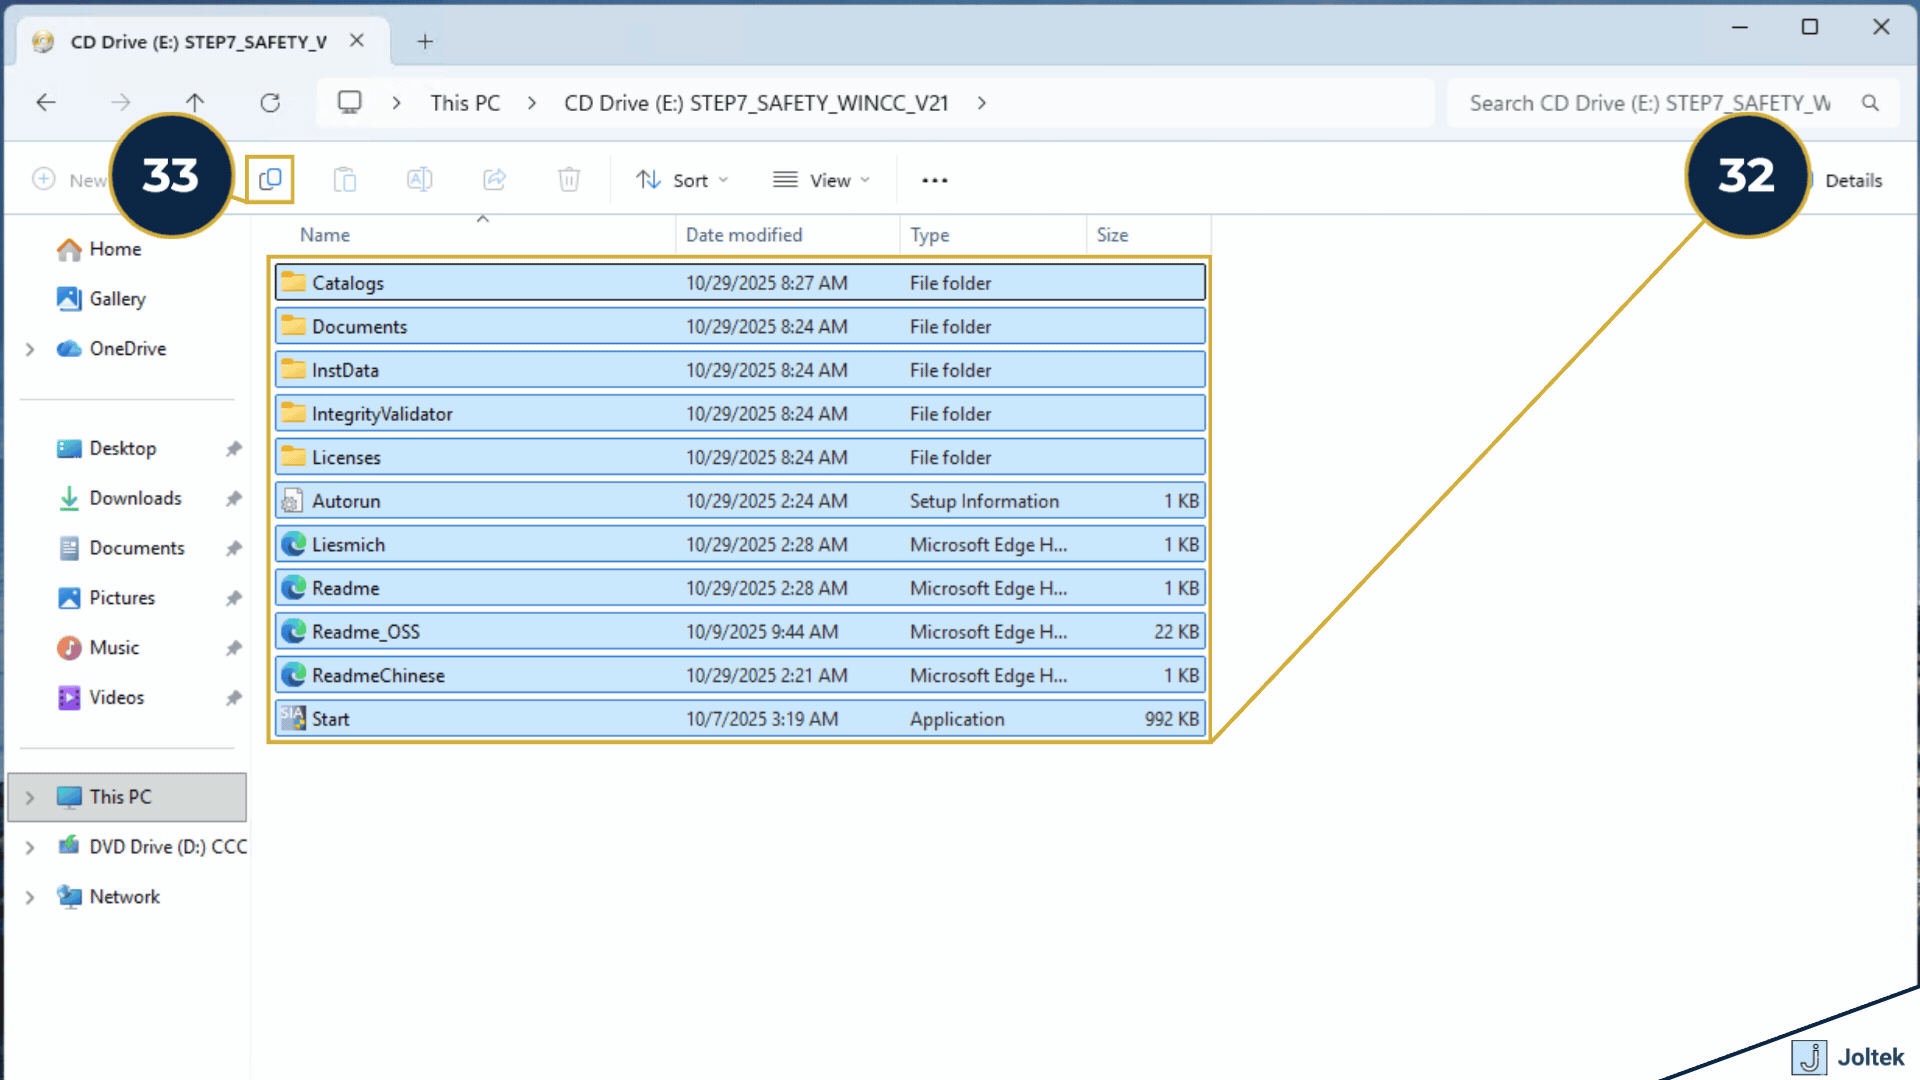
Create a clean local folder on the machine, such as a TIA Portal V21 folder on C drive. Keeping the installation files organized will make it easier if you need to retry the setup or add components later.
Allow the full copy operation to finish before launching anything. Do not begin the installer while files are still transferring, especially if the machine is a VM with limited disk performance.
Launch the installer from the local copied files rather than the mounted DVD. This is the method shown in the video and is the cleaner approach when the direct media launch causes issues.
The installer will now begin walking you through the standard setup flow. From here onward, the choices are mostly straightforward unless you have unusual system constraints.
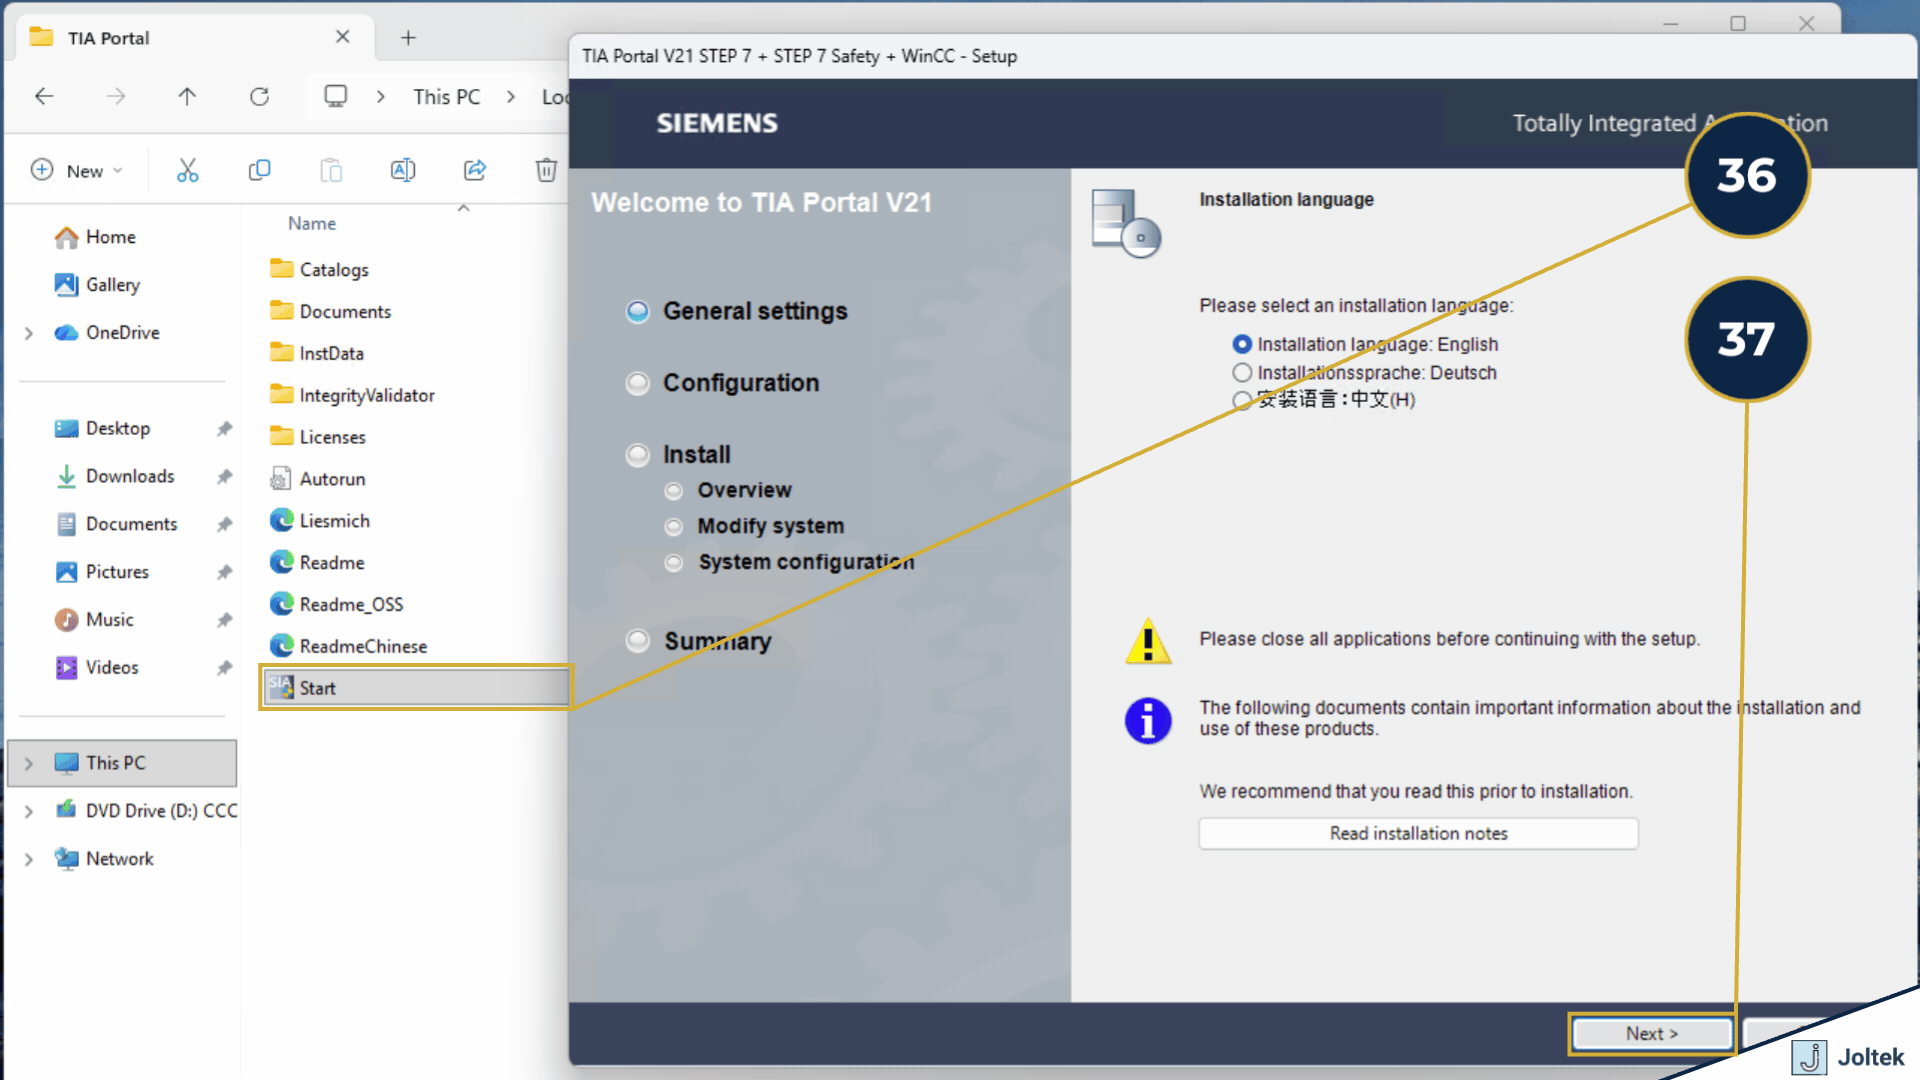
Choose the appropriate installation language, proceed with the typical installation, and keep in mind that the installer may ask for DVD 2 later in the process. Also make sure you have enough free disk space and expect the install to take some time, especially in a virtual machine environment.
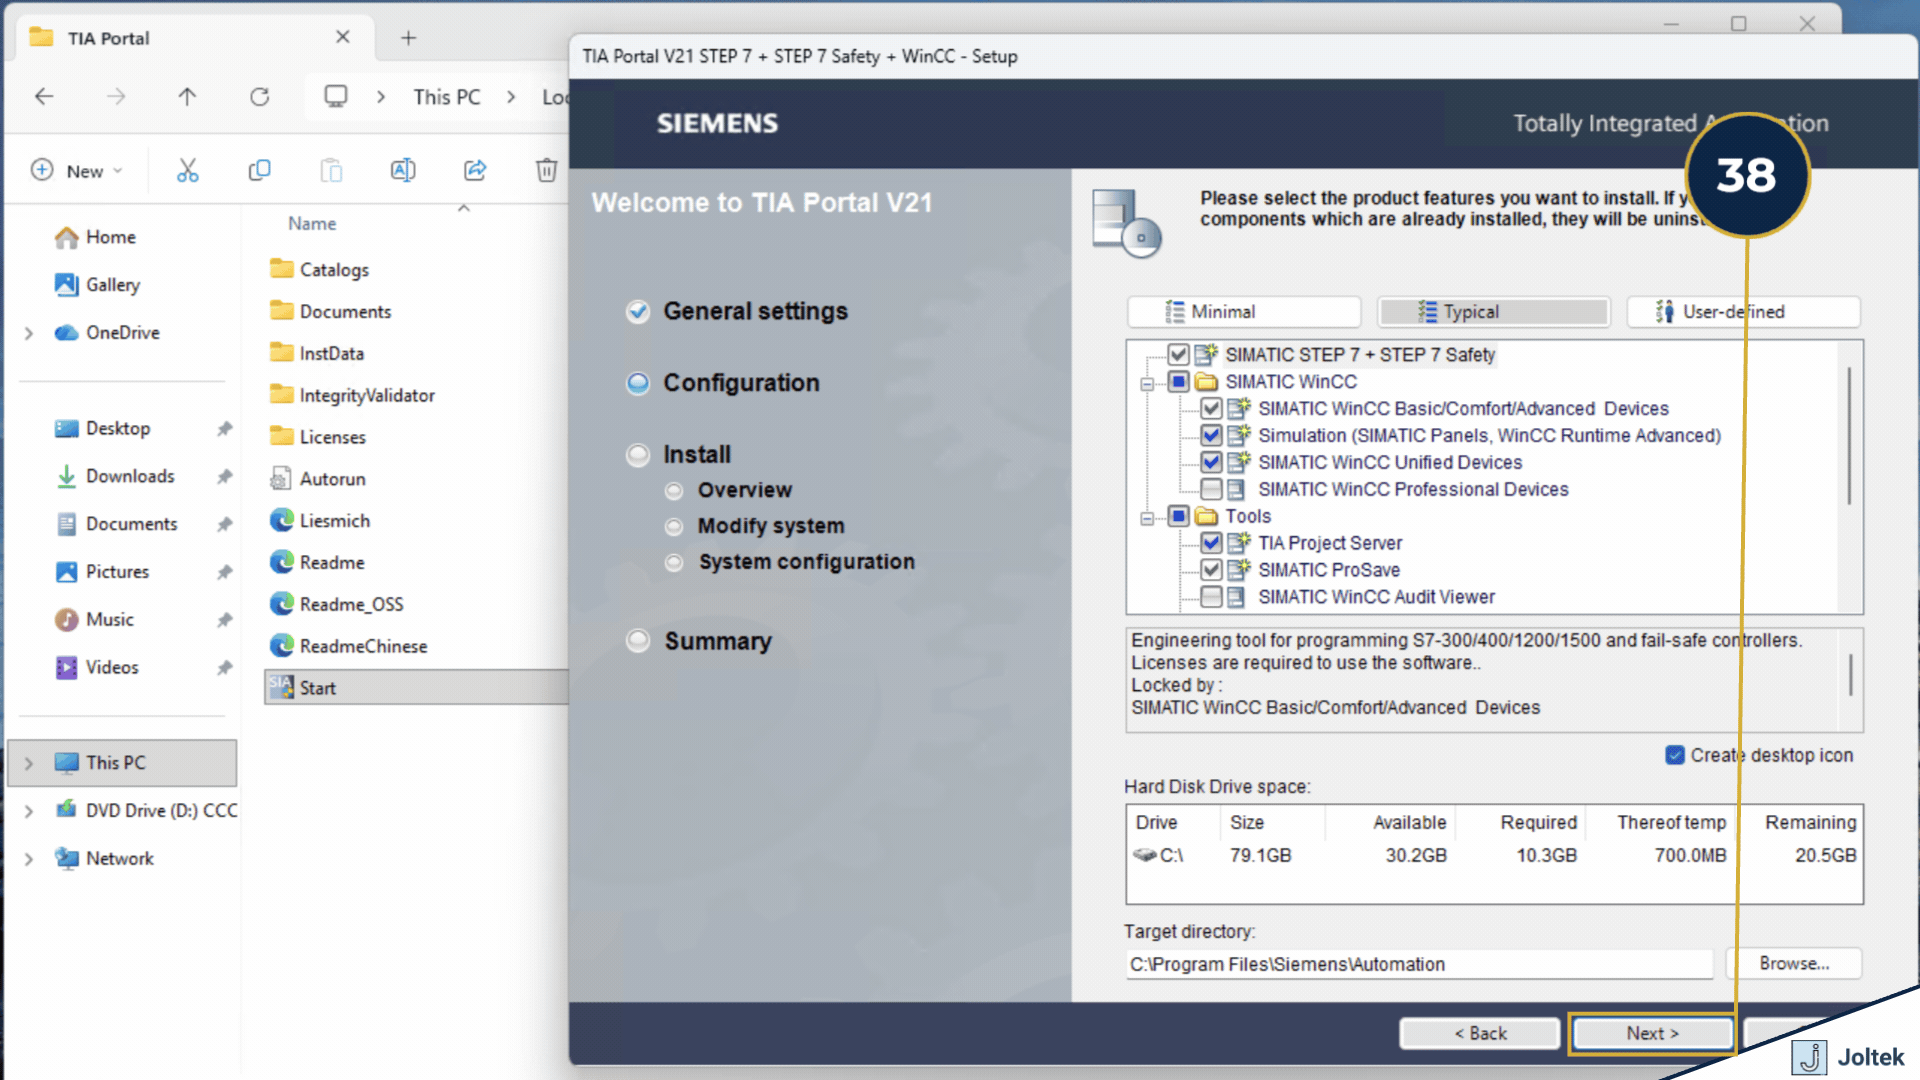

Once installation starts, let it run without interruption and be patient. The process can take a while depending on hardware resources, storage performance, and whether you are running inside a VM. When it finishes, reboot if prompted, then launch TIA Portal and create a simple test project to confirm the environment is working correctly. If you are building a broader engineering workstation or lab, this is also a good point to think about your VM strategy, your workforce development and education path, and whether the machine will later support broader systems integration, controls commissioning, or a structured Windows VM on Proxmox workflow. The relevant Joltek pages are visible in your current sitemap, and the broader Joltek material also reinforces hands on education, integration support, and clean commissioning discipline.

